Nextcloud
- Nextcloud installieren
- Nextcloud Backup mit BorgBackup
- Fulltext Search in Nextcloud
- Nextcloud hinter NginxProxyManager
- Nextcloud Advanced Configuration und Fehlerbehandlung
- Nextcloud Update auf Version 25
- Nextcloud VM oder VM Container mit NAS verbinden
- Nextcloud Backup
- Nextcloud PHP configuration
- Allgemeine Nextcloud Befehle
- Nextcloud auf anderen Server umziehen
- External Storage auf Nextcloud
Nextcloud installieren
Nextcloud 27 installieren
Befehle:
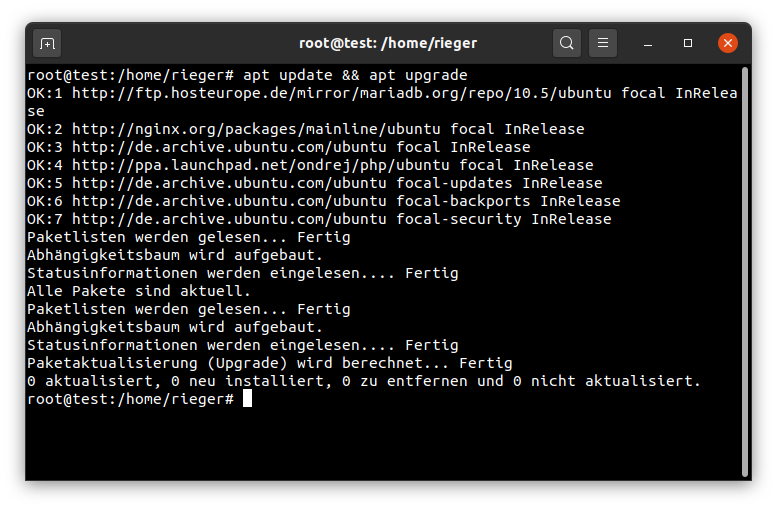
Updating
apt update && apt upgrade -yindividuelle Anpassung des Speicherplatzes
# Fstab anpassen
nano /etc/fstab

# Daten
/dev/sdb 	/mnt/Daten 	ext4  defaults 0 2

# Datensicherung mit Borgbackup auf DS
//192.168.1.100/pxxData/ncbackup /mnt/smb-ds cifs uid=1000,gid=1000,rw,user,credentials=/root/.smbzuga 0 0
Formatieren von /dev/sdb in ext4
mkfs.ext4 /dev/sdb1Credentials
nano /root/.smbzuga

username=username
password=password
Cifs-Utils installieren
Nextcloud VM oder VM Container mit NAS verbinden
Installing apache
apt install apache2Install php 8.2
apt install software-properties-commonadd-apt-repository ppa:ondrej/phpapt updateInstall php 8.2 & Moduls
apt install php8.2 libapache2-mod-php8.2 php8.2-zip php-dompdf php8.2-xml php8.2-mbstring php8.2-gd php8.2-curl php8.2-imagick libmagickcore-6.q16-6-extra php8.2-intl php8.2-bcmath php8.2-gmp php8.2-cli php8.2-mysql php8.2-zip php8.2-gd php8.2-mbstring php8.2-curl php8.2-xml php-pear unzip nano php8.2-apcu redis-server ufw php8.2-redis php8.2-smbclient php8.2-ldapadjust PHP.ini file
nano /etc/php/8.2/apache2/php.inimemory_limit = 2048M
upload_max_filesize = 20G
post_max_size = 20G
date.timezone = Europe/Berlin
output_buffering = OffInstall Database Server
apt install mariadb-serverMaria DB Server Konfigurateion
mysql_secure_installationOpen SQL dialog
mysqlCreate databas calles nextcloud
CREATE DATABASE nextcloud; Create database user with password
CREATE USER 'nextclouduser'@'localhost' IDENTIFIED BY 'password_here';Grant access to database
GRANT ALL PRIVILEGES ON nextcloud.* TO 'nextclouduser'@'localhost';Save changes and exit
FLUSH PRIVILEGES;EXIT;Download latest nextcloud version
cd /tmp && wget https://download.nextcloud.com/server/releases/latest.zipunzip latest.zipmv nextcloud /var/www/adjust apache conf
nano /etc/apache2/sites-available/000-default.conf-> change /var/www/html to /var/www/nextcloud
Enable the NextCloud and Rewrite Module
a2enmod rewritea2enmod headersa2enmod enva2enmod dira2enmod mimerestarat apache
service apache2 restartprepare data folder
mkdir /home/data/chown -R www-data:www-data /home/data/chown -R www-data:www-data /var/www/nextcloud/chmod -R 755 /var/www/nextcloud/Nextcloud am Browser Aufrufen
Über die IP-Adresse kann die Nextcloud jetzt erreicht werden.
Über Nginx Proxy Manager erreichbar machen
Vertrauenswürdigen server erstellen
cd /var/www/nextcloudNextcloud 24 installieren
Nextcloud 24 auf einem Ubuntu Server installieren
Bei der Installation von PHP die Befehle einzeln eingeben.
# updating
apt update && apt upgrade -y

# Installing apache
apt install apache2

# Install PHP 8.1 (Diese Befehle einzeln eingeben)
apt install software-properties-common
add-apt-repository ppa:ondrej/php
apt update

# Install PHP 8.1 & Moduls
apt install php8.1 libapache2-mod-php8.1 php8.1-zip php-dompdf php8.1-xml php8.1-mbstring php8.1-gd php8.1-curl php8.1-imagick libmagickcore-6.q16-6-extra php8.1-intl php8.1-bcmath php8.1-gmp php8.1-cli php8.1-mysql php8.1-zip php8.1-gd  php8.1-mbstring php8.1-curl php8.1-xml php-pear unzip nano php8.1-apcu redis-server ufw php8.1-redis

# adjust PHP.ini file
nano /etc/php/8.1/apache2/php.ini

memory_limit = 1024M
upload_max_filesize = 16G
post_max_size = 16G
date.timezone = Europe/Berlin
output_buffering = Off


# Install Databse Server
apt install mariadb-server

# Maria DB Server Konfiguration
mysql_secure_installation

# open SQL dialoge
mysql

# create database calles nextcloud
CREATE DATABASE nextcloud;

# create database user with password
CREATE USER 'nextclouduser'@'localhost' IDENTIFIED BY 'password_here';

#grant accesss to databse
GRANT ALL PRIVILEGES ON nextcloud.* TO 'nextclouduser'@'localhost';

#save changes and exit
FLUSH PRIVILEGES;
EXIT;

# Download lastest nextcloud version
cd /tmp && wget https://download.nextcloud.com/server/releases/latest.zip
unzip latest.zip
mv nextcloud /var/www/

#edit new conf
nano /etc/apache2/sites-available/000-default.conf

DocumentRoot auf /var/www/nextcloud ändern

# Enable the NextCloud and Rewrite Module

a2enmod rewrite
a2enmod headers
a2enmod env
a2enmod dir
a2enmod mime

# restart apache
service apache2 restart

# prepare data folder
mkdir /home/data/
chown -R www-data:www-data /home/data/

chown -R www-data:www-data /var/www/nextcloud/
chmod -R 755 /var/www/nextcloud/

## create Let's Encrypt SSL-Certificate

#install certbot
apt install certbot python3-certbot-apache

certbot --apache -m master@domain.com -d cloud.domain.com

--> Domain ansurfen und Einrichtung abschließen
Nextcloud Backup mit BorgBackup
Installationsanleitung
NAS mounten und Ordner erstellen
Hier werden die Ordner Daten, temp und restore in einem gemounteten Laufwerk erstellt.
mkdir -p /mnt/smb-ds/daten /mnt/smb-ds/temp /mnt/smb-ds/restoreBorg Backup installieren
apt install -y borgbackupRepository erstellen
borg init -e repokey-blake2 /mnt/smb-ds/daten/Das Backup-Skript erstellen
Mit Hilfe von Nano wird das Skript im Root-Verzeichnis erstellt.
nano /root/backup.shInhalt des Skripts (die Ordner dementsprechend anpassen):
#!/bin/bash
##################################
### Beispieldaten:
### logDirectory="/backup_logs/"
### backupDiscMount="/backup/"
### localBackupDir="/backup/temp"
##################################
export BORG_PASSPHRASE='<borg-password>'
export BORG_UNKNOWN_UNENCRYPTED_REPO_ACCESS_IS_OK=yes
export BORG_RELOCATED_REPO_ACCESS_IS_OK=yes
startTime=$(date +%s)
currentDate=$(date --date @"$startTime" +"%Y%m%d_%H%M%S")
currentDateReadable=$(date --date @"$startTime" +"%d.%m.%Y - %H:%M:%S")
logDirectory="/var/log/"
logFile="${logDirectory}/${currentDate}.log"
backupDiscMount="/backup/daten/"
localBackupDir="/backup/temp"
borgRepository="${backupDiscMount}/"
borgBackupDirs="/home/data/ /var/www/nextcloud/ $localBackupDir/"
nextcloudFileDir='/var/www/nextcloud'
webserverServiceName='apache2'
webserverUser='www-data'
nextcloudDatabase='nextcloud'
dbUser='root'
dbPassword='<db-password>'
fileNameBackupDb='nextcloud-db.sql'
if [ ! -d "${logDirectory}" ]
then
    mkdir -p "${logDirectory}"
fi
errorecho() { cat <<< "$@" 1>&2; }
exec > >(tee -i "${logFile}")
exec 2>&1
if [ "$(id -u)" != "0" ]
then
    errorecho "ERROR: This script has to be run as root!"
    exit 1
fi
if [ ! -d "${localBackupDir}" ]
then
    errorecho "ERROR: The local backup directory ${localBackupDir} does not exist!"
    exit 1
fi
echo -e "\n###### Start des Backups: ${currentDateReadable} ######\n"
echo -e "Daten werden zusammengestellt"
dpkg --get-selections > "${localBackupDir}/software.list"
sudo -u "${webserverUser}" php ${nextcloudFileDir}/occ maintenance:mode --on
echo "apache2 wird gestoppt"
systemctl stop "${webserverServiceName}"
echo "Datenbanksicherung wird erstellt"
mysqldump --single-transaction --routines -h localhost -u "${dbUser}" -p"${dbPassword}" "${nextcloudDatabase}" > "${localBackupDir}/${fileNameBackupDb}"
echo -e "\nBackup mit borgbackup"
borg create --stats \
    $borgRepository::"${currentDate}" \
    $localBackupDir \
    $borgBackupDirs
echo
echo "webserver wird gestartet"
systemctl start "${webserverServiceName}"
sudo -u "${webserverUser}" php ${nextcloudFileDir}/occ maintenance:mode --off
rm "${localBackupDir}"/software.list
rm -r "${localBackupDir}/${fileNameBackupDb}"
borg prune --progress --stats $borgRepository --keep-within=7d --keep-weekly=4 --keep-monthly=6
endTime=$(date +%s)
endDateReadable=$(date --date @"$endTime" +"%d.%m.%Y - %H:%M:%S")
duration=$((endTime-startTime))
durationSec=$((duration % 60))
durationMin=$(((duration / 60) % 60))
durationHour=$((duration / 3600))
durationReadable=$(printf "%02d Stunden %02d Minuten %02d Sekunden" $durationHour $durationMin $durationSec)
echo -e "\n###### Ende des Backups: ${endDateReadable} (${durationReadable}) ######\n"
echo -e "Plattenbelegung:\n"
df -h ${backupDiscMount}
Das Skript ausführbar machen
chmod +x /root/backup.shAutomatisch um 03:00 Uhr ausführen lassen
# Cronjobs öffnen
crontab -e

# Ans Ende der Datei folgenden Befehl hinzufügen
0 3 * * * /root/backup.sh > /dev/null 2>&1
Erstellte Backups anzeigen lassen
borg list /backup/datenBackup in Restore mounten um Daten wiederherzustellen
borg mount /mnt/backup/daten::<date> /mnt/backup/restore/

# Beispiel
borg mount /mnt/backup/daten::20200602_084033 /mnt/backu/restore/
Unmount Backup
borg umount /restore/Die Bash für das Backup befindet sich unter root/backup.sh
Die Datei wird über Cronjob jede Nacht um 03:00 Uhr gestartet
Restore
Als root anmelden
# Backups anzeigen:
borg list /mnt/smb-ds/daten

# mount backup to browse
borg mount /mnt/smb-ds/daten::<date> /restore/
und weiter
Die Daten liegen im Borg Backup:
Daten: mnt/smb-ds/restore/mnt/Daten
Nextcloudfiles: Ordner Var
Datenbank: in smb-ds / *.sql
Backup zurückspielen
Ein Backup anzufertigen ist natürlich nur eine Seite der Medaille. Im Falle des Falles muss das Backup auch zurückgespielt werden können.
Vor der Wiederherstellung versetzen wir Nextcloud wie gewohnt in den Maintenance-Mode:
cd /var/www/nextcloud
sudo -u www-data php occ maintenance:mode --on
Da wir hier ein komplettes Backup wieder einspielen, sollte der Webserver zunächst ein mal gestoppt werden:
# Hier kommt es darauf an welcher Server läuft (Nginx/Apache2)
service apache2 stop
Vor der Wiederherstellung der Dateien der Cloud werden als erstes die entsprechenden Verzeichnisse gelöscht und neu angelegt. Dies sorgt dafür, dass keine Dateien aus dem Zustand vor dem Backup übrigleiben:
rm -r /var/www/nextcloud/
rm -r /var/nextcloud_data/ # Bei mir /mnt/Daten

mkdir -p /var/www/nextcloud/
mkdir -p /var/nextcloud_data/ # Bei mir /mnt/Daten
Nun gilt es zunächst das Nextcloud-Verzeichnis aus dem Backup wiederherzustellen. Da das Datum als Zeitstempel für das Backup diente, muss bei den folgenden Befehlen immer das korrekte Datum verwendet werden:
# gemountetes Backup
cd /mnt/smb-ds/restore
ls
Die Dateien wiederherstellen
rsync -Aax /mnt/smb-ds/restore/mnt/Daten/ /mnt/data/ --progressrsync -Aax /mnt/smb-ds/restore/var/www/nextcloud/ /var/www/nextcloud/ --progressAnschließend werden die Verzeichnis-Berechtigungen noch einmal explizit gesetzt:
chown -R www-data:www-data /var/www/nextcloud
chown -R www-data:www-data /var/nextcloud_data
Zum Schluss wird noch die Datenbank wiederhergestellt. Dazu wird zunächst die Datenbank entfernt und neu angelegt (für die Ausführung der Befehle muss das Passwort des Nextcloud-Datenbankusers angegeben werden):
mysql -h localhost -u nextclouduser -p -e "DROP DATABASE nextcloud"
mysql -h localhost -u nextclouduser -p -e "CREATE DATABASE nextcloud"
Das Einspielen des Backups geschieht durch folgenden Befehl:
mysql -h localhost -u nextclouduser -p nextcloud < /mnt/Share/Backups/Nextcloud/NextcloudBackup_DB_20170912.sql
Nun wird der Webserver wieder gestartet:
service apache2 start
Redis installieren
Damit Nextcloud bei mir richtig läuft muss noch redis installiert werden:
Nextcloud Advanced Configuration
Nun wird Nextcloud wieder aus dem Maintenance-Mode geholt.
cd /var/www/nextcloud
sudo -u www-data php occ maintenance:mode --off
Zum Schluss muss noch ein Befehl abgesetzt werden, damit Nextcloud-Clients mitbekommen können, dass sich hier etwas durch das Wiederherstellen eines Backups verändert hat:
cd /var/www/nextcloud
sudo -u www-data php occ maintenance:data-fingerprint
Nach diesen Schritten wurde ein Backup von Nextcloud wiederhergestellt und es kann wieder mit der Cloud gearbeitet werden.
Backup unmount
# Unmount the Backup
borg umount /restore/
Backups Bereinigen
# delete a single backup archive:
$ borg delete /path/to/repo::Monday
# actually free disk space:
$ borg compact /path/to/repo

# delete all archives whose names begin with the machine's hostname followed by "-"
$ borg delete --prefix '{hostname}-' /path/to/repo

# delete all archives whose names contain "-2012-"
$ borg delete --glob-archives '*-2012-*' /path/to/repo

# see what would be deleted if delete was run without --dry-run
$ borg delete --list --dry-run -a '*-May-*' /path/to/repo

# delete the whole repository and the related local cache:
$ borg delete /path/to/repo
You requested to completely DELETE the repository *including* all archives it contains:
repo                                 Mon, 2016-02-15 19:26:54
root-2016-02-15                      Mon, 2016-02-15 19:36:29
newname                              Mon, 2016-02-15 19:50:19
Type 'YES' if you understand this and want to continue: YES
Fehlerbehebung
Failed to create/acquire the lock
borg break-lock /mnt/smb-ds/daten/
Fulltext Search in Nextcloud
Volltextsuche für Nextcloud
Neue Vorgehensweise
Machen wir uns also zunächst an die Installation von Elasticsearch. Als erstes bringen wir das System wie immer auf den neusten Stand:
apt update && apt upgrade -V
Als nächstes müssen die Paketquellen für Elasticsearch auf dem System hinzugefügt werden, da wir Elasticsearch aus den Paketquellen des Herstellers installieren wollen. Dazu holen wir uns erst einmal den Repository-Key auf das System:
wget -O - https://artifacts.elastic.co/GPG-KEY-elasticsearch | gpg --dearmor -o /etc/apt/keyrings/elasticsearch-keyring.gpg
Dann werden die Paketquellen selbst hinzugefügt:
echo "deb [signed-by=/etc/apt/keyrings/elasticsearch-keyring.gpg] https://artifacts.elastic.co/packages/8.x/apt stable main" | tee /etc/apt/sources.list.d/elastic-8.x.list
Nun kann Elasticsearch auch schon installiert werden:
apt update && apt install elasticsearch
Während der Installation werden euch ein paar Infos angezeigt:
--------------------------- Security autoconfiguration information ------------------------------

Authentication and authorization are enabled.
TLS for the transport and HTTP layers is enabled and configured.

The generated password for the elastic built-in superuser is : <password>

...

-------------------------------------------------------------------------------------------------
Das hier angezeigte Passwort könnt ihr euch mal an einem sicheren Ort notieren (z.B. in einem Passwort-Safe). Der dazugehörige Benutzer trägt dabei den Namen „elastic“. Seit Elasticsearch 8 ist die erweitere Sicherheit standardmäßig aktiviert. Um daher mit Elasticsearch „sprechen“ zu können, werden diese Anmeldedaten benötigt.
Da wir Elasticsearch später so konfigurieren werden, dass der Zugriff nur lokal auf dem Server stattfinden kann, werden diese Sicherheitsfeatures nicht benötigt. Trotzdem würde ich empfehlen, dass ihr euch das hier angezeigte Passwort irgendwo notiert, falls ihr dieses später doch mal benötigen solltet.
I have managed to solved it on my own.
So exit code 137 means that Elasticsearch is taking up too much memory in my server.
My solution was to locate jvm.options in /etc/elasticsearch.
I have copied a jvm.options into jvm.options.d folder and uncommented a line to set this inside.
-Xms1g
-Xmx1g
################################################################
## IMPORTANT: JVM heap size
################################################################
##
## The heap size is automatically configured by Elasticsearch
## based on the available memory in your system and the roles
## each node is configured to fulfill. If specifying heap is
## required, it should be done through a file in jvm.options.d,
## which should be named with .options suffix, and the min and
## max should be set to the same value. For example, to set the
## heap to 4 GB, create a new file in the jvm.options.d
## directory containing these lines:
##
-Xms1g
-Xmx1g
##
## See https://www.elastic.co/guide/en/elasticsearch/reference/8.14/heap-size.html
## for more information
##
Hope it helps!
Ebenso sagt euch die Installation, dass Elasticsearch noch nicht gestartet wurde. Freundlicherweise werden aber im gleichen Atemzug die Befehle aufgeführt, mit denen ihr dies bewerkstelligen könnt:
sudo systemctl daemon-reload
sudo systemctl enable elasticsearch.service
sudo systemctl start elasticsearch.service
Vorherige Vorgehensweise
Da die Signierung der vorherigen Vorgehensweise veraltet ist.
Ubuntu
apt install apt-transport-https sudo wget curl gnupgecho "deb [signed-by=/etc/apt/trusted.gpg.d/elasticsearch.gpg] https://artifacts.elastic.co/packages/7.x/apt stable main"| \
tee -a /etc/apt/sources.list.d/elastic-7.x.list > /dev/nullcurl -fsSL https://artifacts.elastic.co/GPG-KEY-elasticsearch | \
gpg --dearmor | tee /etc/apt/trusted.gpg.d/elasticsearch.gpg> /dev/nullapt updateapt install elasticsearch/usr/share/elasticsearch/bin/elasticsearch-plugin install ingest-attachmentNach dem installieren von Elasticsearch and die Plugins den Start aktivieren
systemctl start elasticsearchsystemctl enable elasticsearch
Weiter geht es, um auch PDF's durchsuchen zu können
Vorherige Vorgehensweise

Nextcloud mit Elasticsearch/Tessaract
Wir beginnen mit der Aktualisierung des Servers selbst.
sudo -s
apt update && apt upgrade
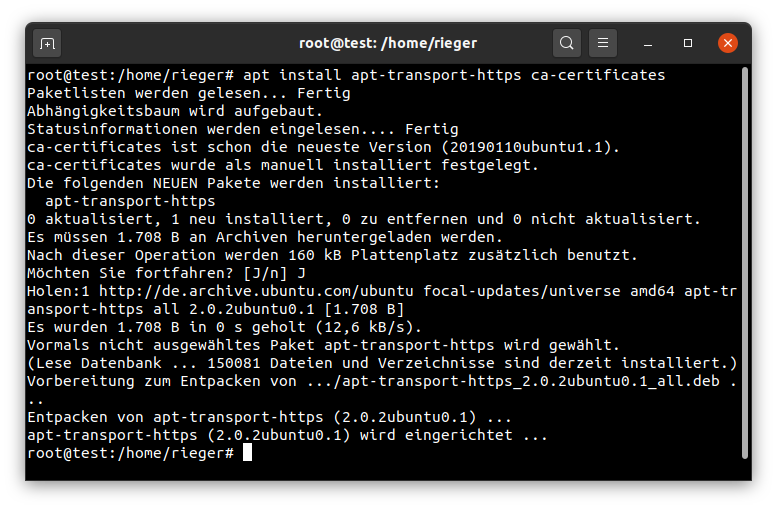
Im Anschluss daran werden die Softwareanforderungen an die Volltextsuche sichergestellt und erfüllt.
apt install apt-transport-https ca-certificates
apt install openjdk-8-jre
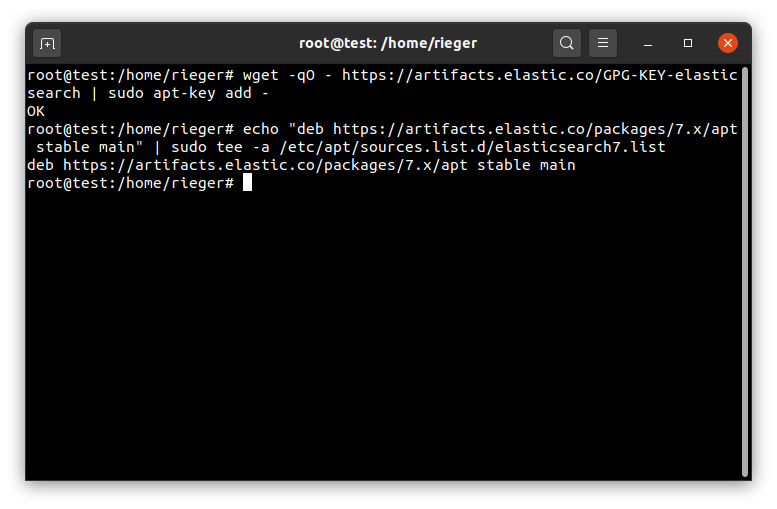
Jetzt laden wir den elasticsearch-Key des Software-Repositories herunter und publizieren diesen im System
wget -qO - https://artifacts.elastic.co/GPG-KEY-elasticsearch | sudo apt-key add -
um das hinzuzufügende Repository nutzen zu können:
echo "deb https://artifacts.elastic.co/packages/7.x/apt stable main" | sudo tee -a /etc/apt/sources.list.d/elasticsearch7.list
Elasticsearch kann nun bereits installiert werden:
apt update && apt install elasticsearch -y

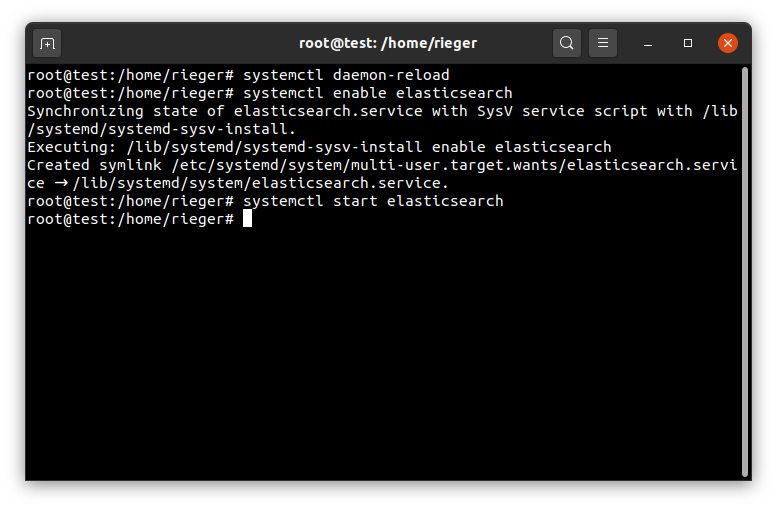
Die Installation ist abgeschlossen – konfigurieren wir Elasticsearch noch für den automatischen Start:
systemctl daemon-reload
systemctl enable elasticsearch
systemctl start elasticsearch
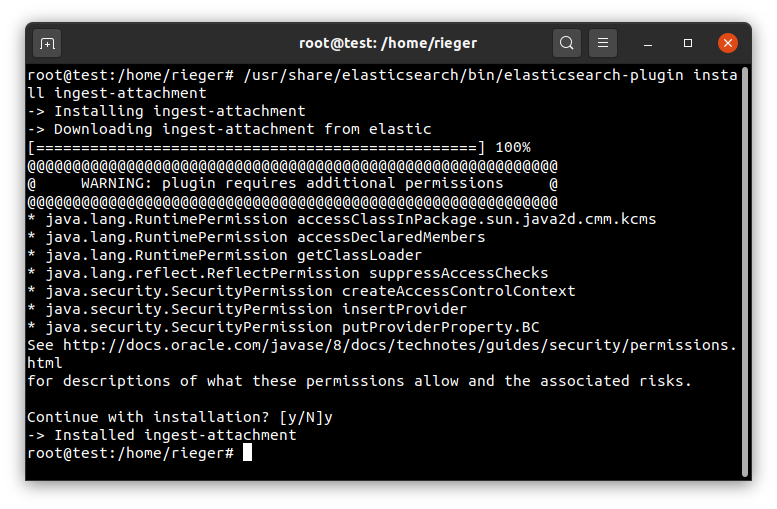
Um auch PDF Dokumente inhaltlich durchsuchen zu können installieren wir noch ein Plugin für Elasticsearch:
/usr/share/elasticsearch/bin/elasticsearch-plugin install ingest-attachment
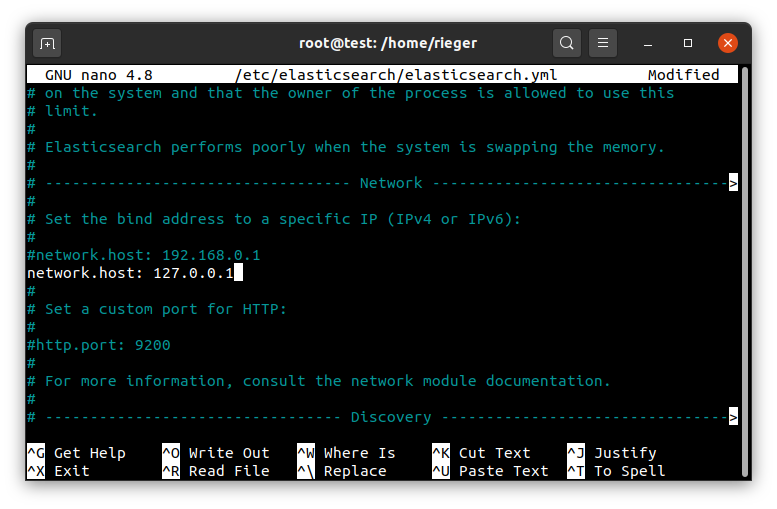
Abschließend editieren wir noch die Konfiguration hinsichtlich des network.host:
nano /etc/elasticsearch/elasticsearch.yml
Tragen Sie Folgendes ein:
network.host: 127.0.0.1
Nach einem Neustart von Elasticsearch ist die Volltextsuche für Nextcloud bereits vorbereitet und einsatzfähig.
service elasticsearch restart
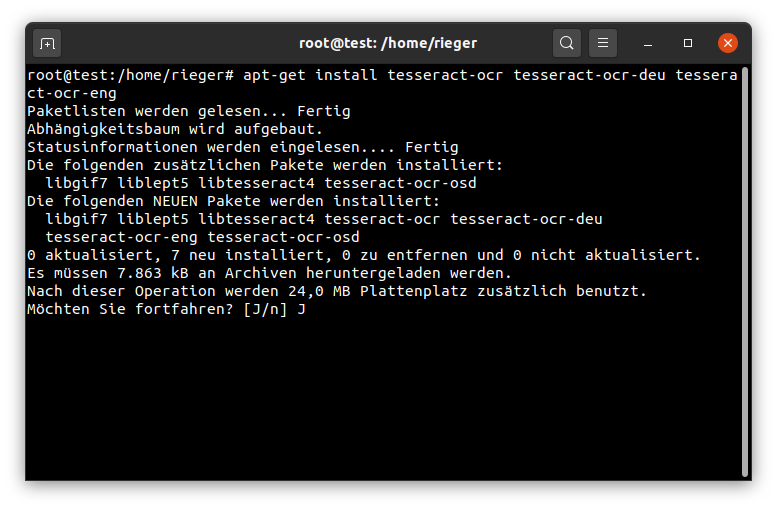
Um Text aus Bildern lesbar und somit auch durchsuchbar zu machen benötigen wir noch Tessaract (OCR).
apt-get install tesseract-ocr tesseract-ocr-deu tesseract-ocr-eng
Nach einem Neustart des elasticsearch-Services
service elasticsearch restart
können wir mit der Einrichtung, also der Aktivierung und Konfiguration der Apps in Nextcloud fortfahren.
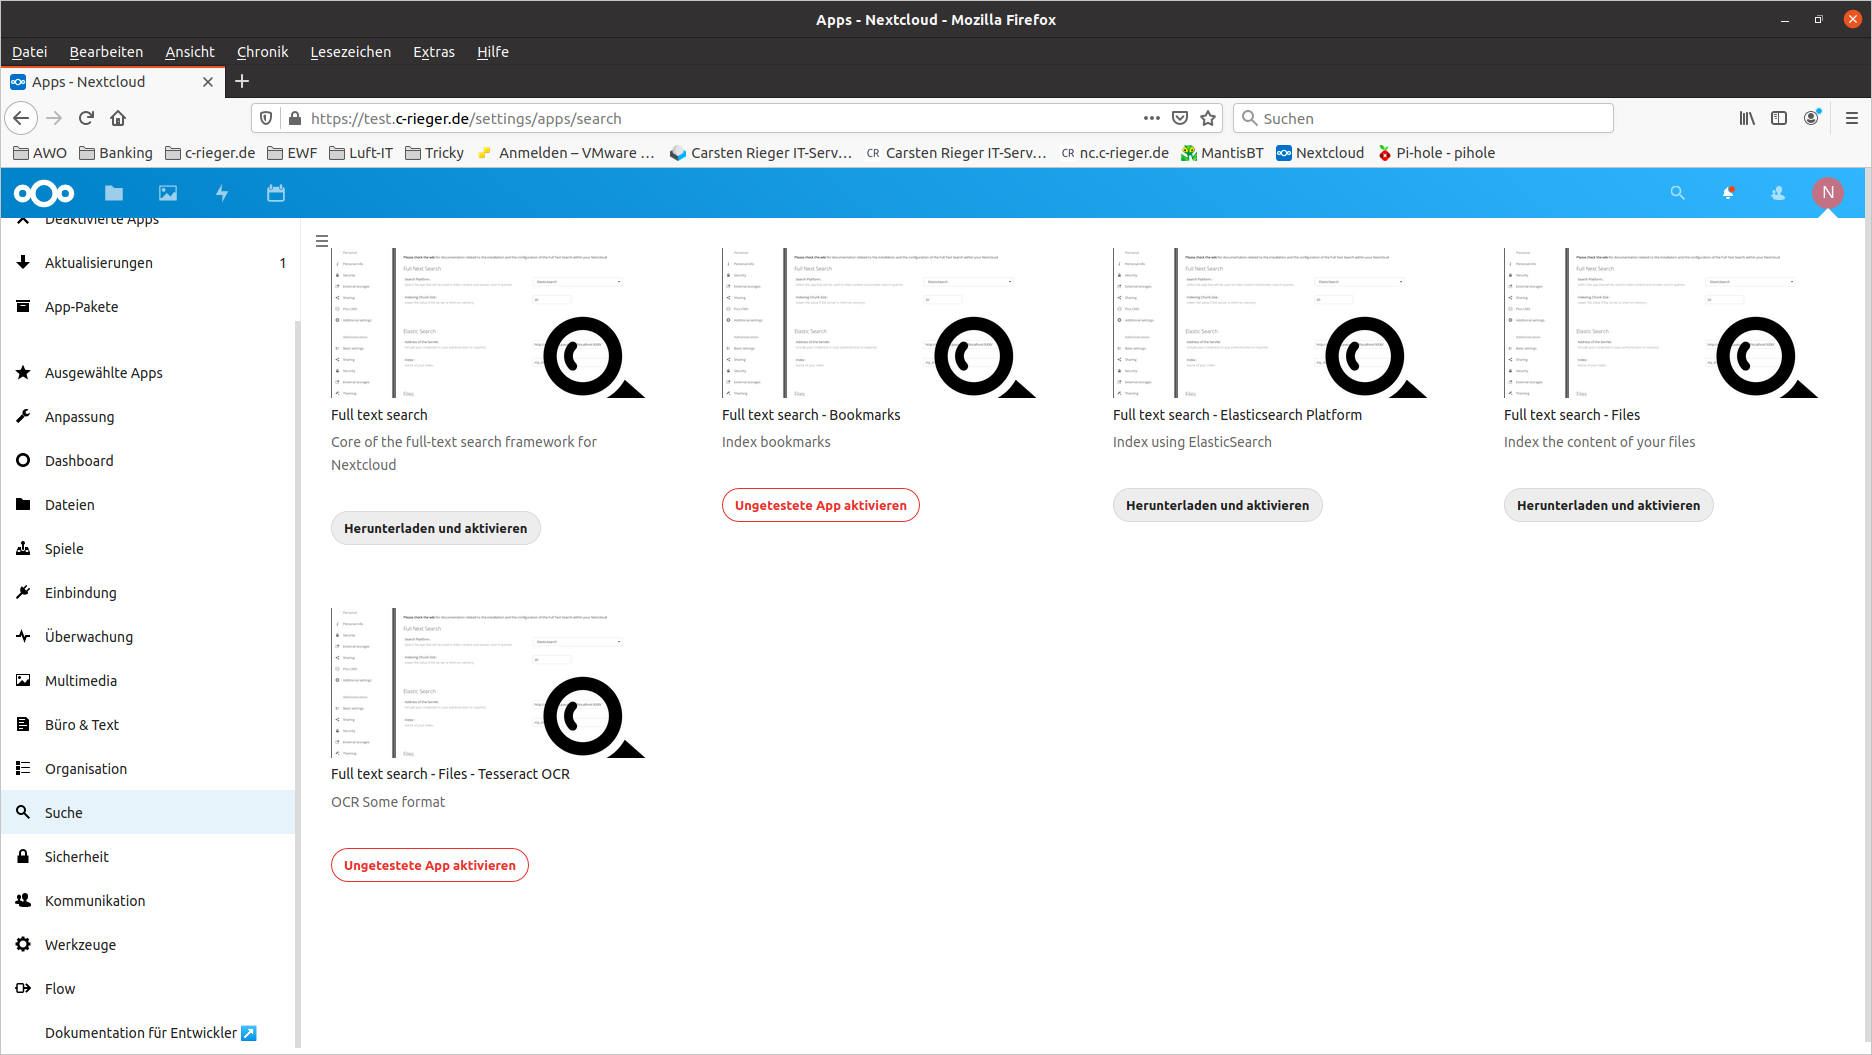
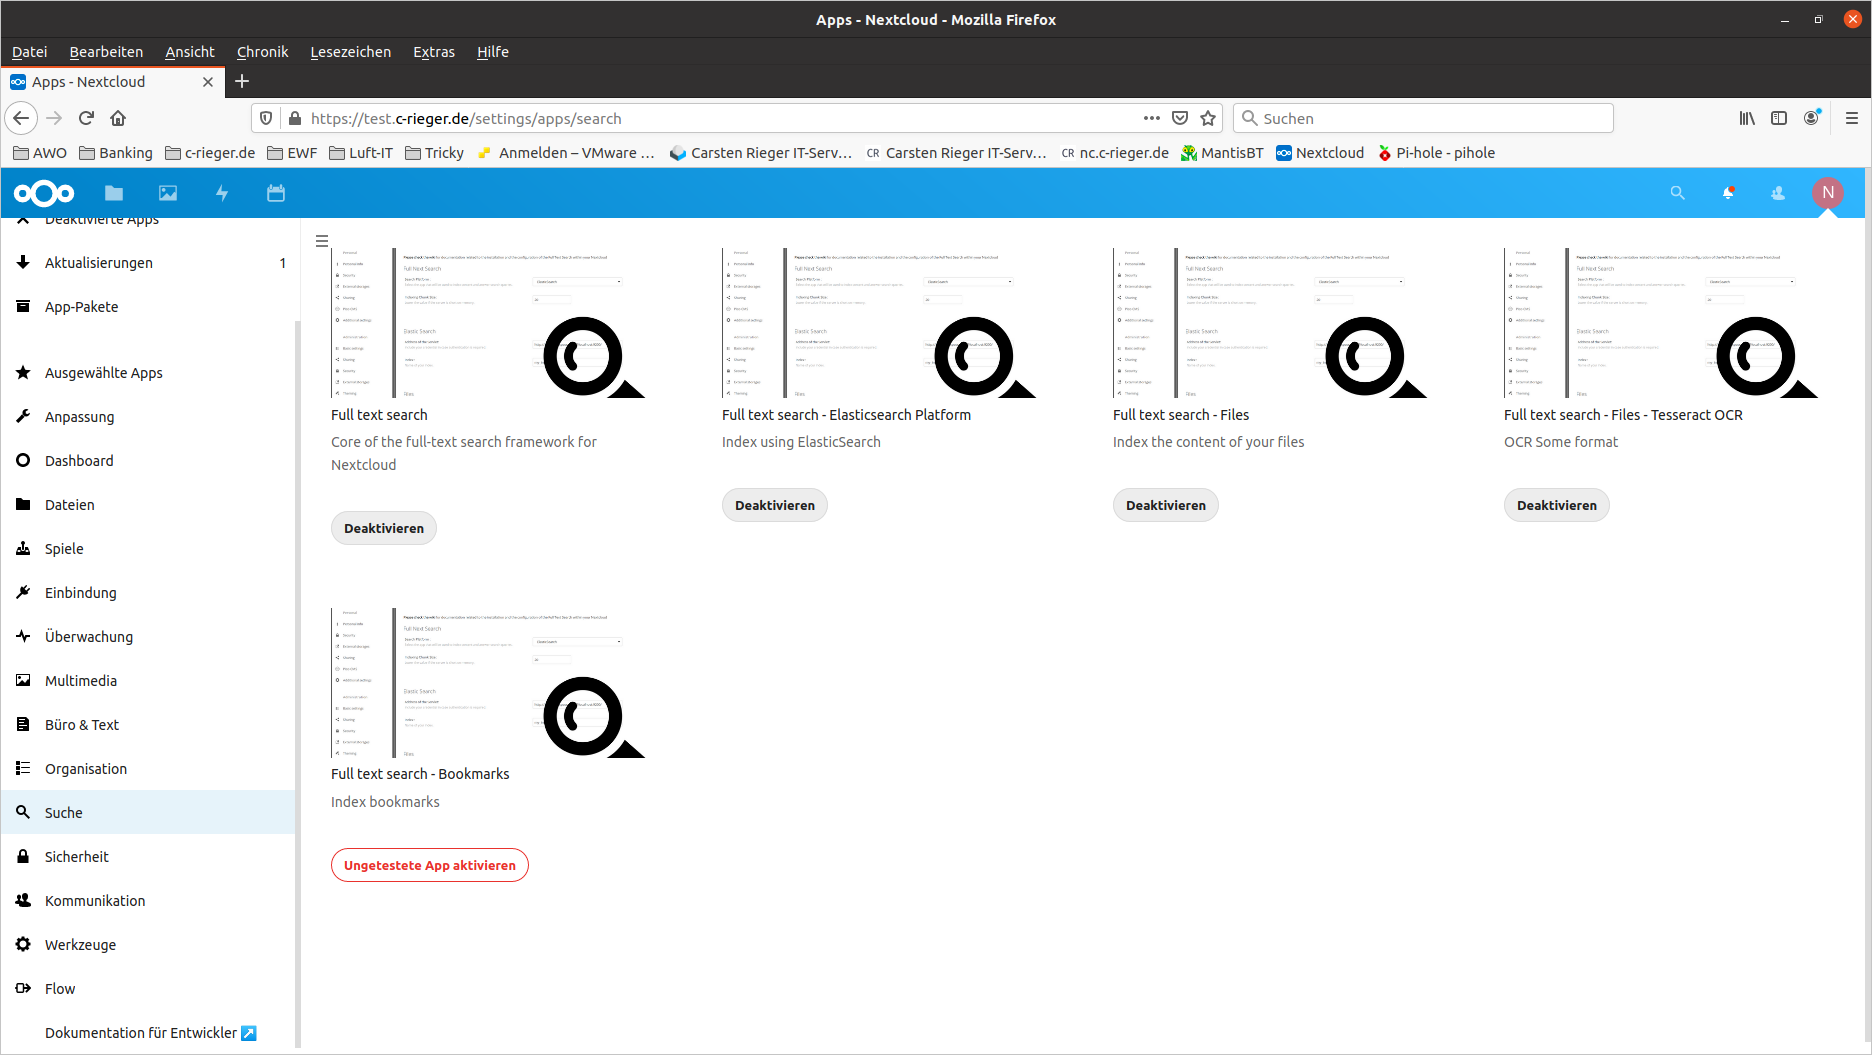
Aktivieren Sie mindestens diese Apps:
- Full text search – Diese App bietet die Grundfunktionen zur Volltextsuche
- Full text search – Elasticsearch Platform: Dies stellt die Verbindung zur Suchmaschine her.
- Full text search – Files: Erweitert die Dateien-App um die Volltextsuche.
- Full text search – Files – Tesseract OCR: Verbindung zu Tesseract.
Bevor die Volltextsuche in Nextcloud genutzt werden kann muss diese noch konfiguriert werden. Dies geschieht in den Nextcloud-Administratoreinstellungen unter Volltextsuche:
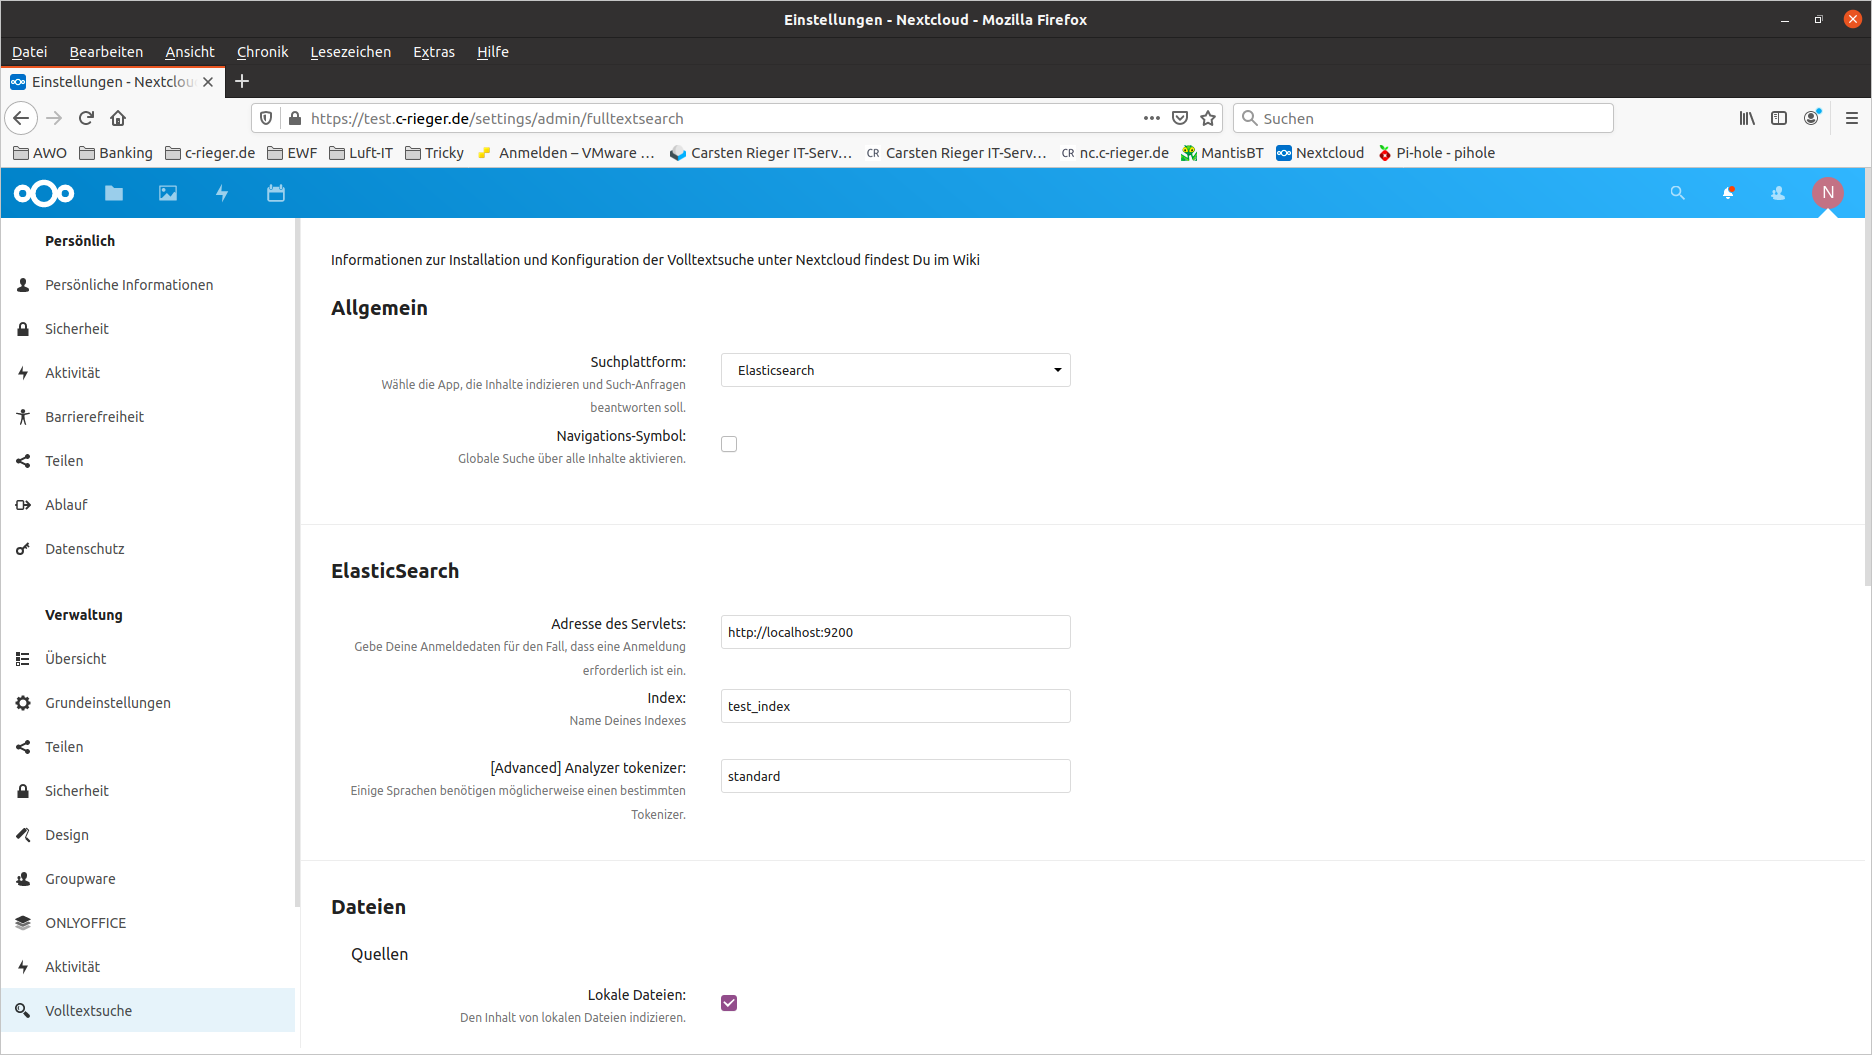
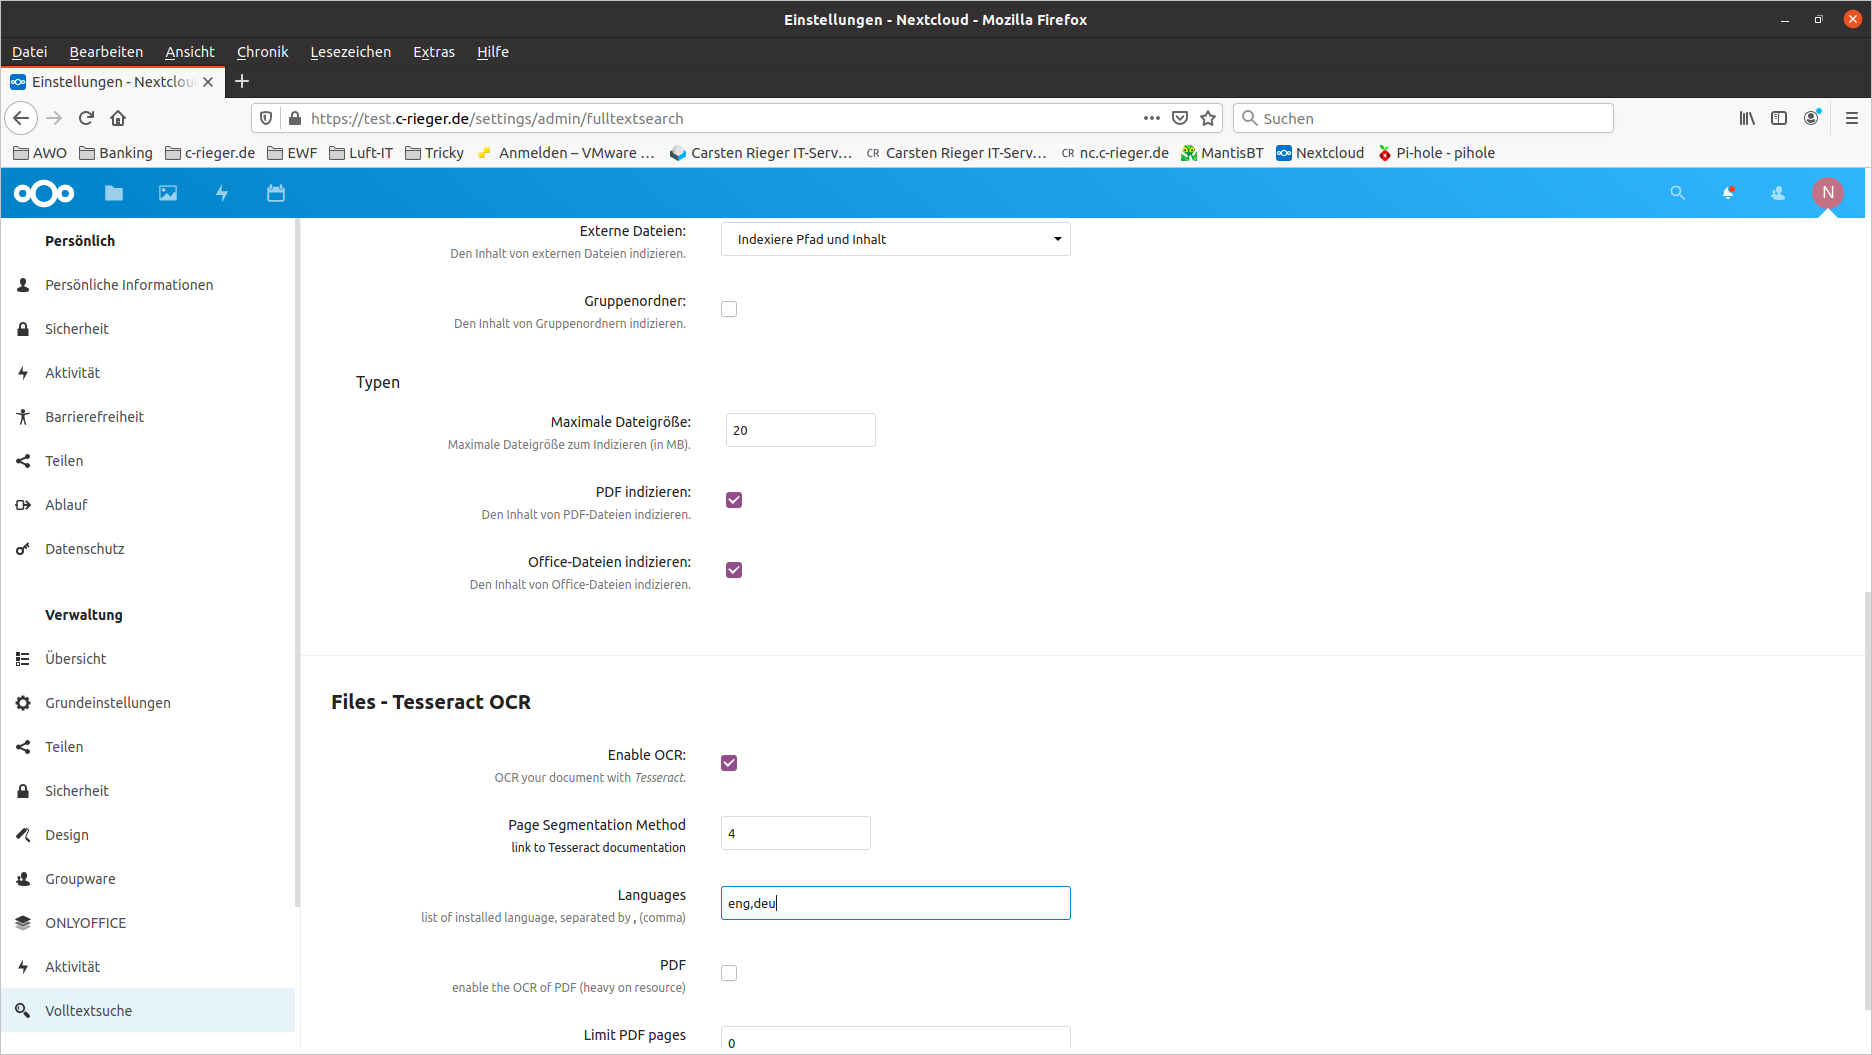
Die Werte werden automatisch gespeichert! Nun erzeugen wir noch initial den Volltextindex über das Nextcloud Kommandozeilentool occ:
sudo -u www-data php /var/www/nextcloud/occ fulltextsearch:index
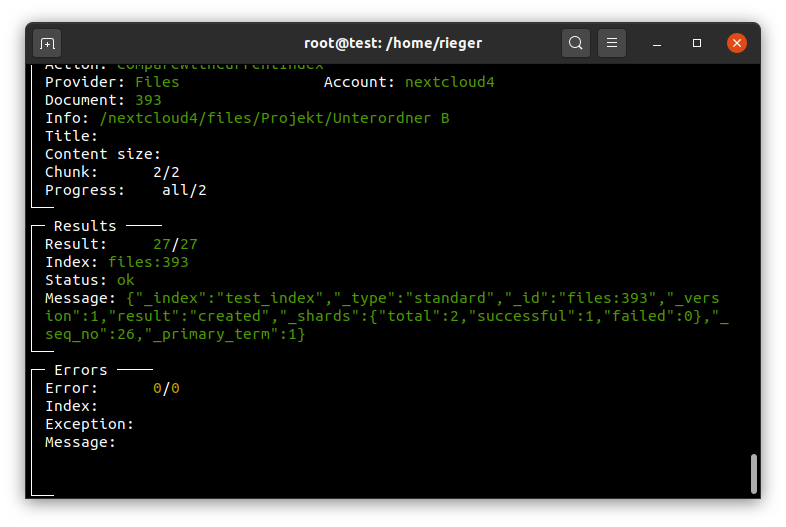
Achtung:
Je nach Größe des Datenbestands kann dieser Befehl Minuten bis Stunden dauern.
Nach dem initialen Anlegen des Volltextindexes muss der zuvor ausgeführte Befehl nicht mehr regelmäßig ausgeführt werden. Die Aktualisierung des Indexes erfolgt dann im Rahmen des Nextcloud-Cronjobs.
Nach der Indizierung finden Sie über die Suche Dokumente sowohl über die Dateienamen, als auch über Inhalte.
Sofern Updates eingespielt werden muss das Plugin aktualisiert werden. Ein Blick in das Logfile lohnt sich und gibt entsprechende Auskunft:
nano /var/log/elasticsearch/elasticsearch.log
„… org.elasticsearch.bootstrap.StartupException: java.lang.IllegalArgumentException: Plugin [ingest-attachment] was built for Elasticsearch version…“
Update Plugin nach Update Nextcloud oder Rechner
Wir entfernen zuerst das bestehende Plugin,
/usr/share/elasticsearch/bin/elasticsearch-plugin remove ingest-attachment
um es anschließend in der neuen Version zu installieren:
/usr/share/elasticsearch/bin/elasticsearch-plugin install ingest-attachment
Nach einem Neustart des Dienstes wird die Volltextsuche wieder funktionieren.
Die Installation und Konfiguration der Volltextsuche für Ihren Nextcloudserver wurde erfolgreich abgeschlossen und so wünsche ich Ihnen viel Spaß mit Ihren Daten in Ihrer privaten Cloud. Über Ihre Unterstützung (diese wird ordnungsgemäß versteuert!) würden sich meine Frau, meine Zwillinge und ich sehr freuen!
Nextcloud hinter NginxProxyManager
Damit Nextcloud keine Fehlermeldungen wegen dem ProxyServer anzeigt
NginxProxyManager Advanced Settings
#### NginxProxyManager Advanced Settings #####

rewrite ^/.well-known/host-meta /public.php?service=host-meta last;
    rewrite ^/.well-known/host-meta.json /public.php?service=host-meta-json last;

    location = /.well-known/carddav {
      return 301 $scheme://$host:$server_port/remote.php/dav;
    }
    location = /.well-known/caldav {
      return 301 $scheme://$host:$server_port/remote.php/dav;
    }
    location = /.well-known/webfinger {
      return 301 $scheme://$host:$server_port/index.php/.well-known/webfinger;
    }
    location = /.well-known/nodeinfo {
      return 301 $scheme://$host:$server_port/index.php/.well-known/nodeinfo;
    }
Damit Nextcloud funktioniert muss die Domain in der config.php eingetragen werden.
Für Nginx noch einen Trustet Proxy in config.php eintragen:
	'trusted_proxies' => ['10.1.1.100'],
    'overwriteprotocol' => 'https',
Komma nicht vergessen
Nextcloud Advanced Configuration und Fehlerbehandlung
Um bekannte Warnmeldungen zu beheben
Nextcloud 27 Optimierungen
#1 Nginx Advanced Setting
# Die untenstehenden Zeilen in Nginx Reverse Proxy in Advanced eintragen

location /.well-known/carddav {
    return 301 $scheme://$host/remote.php/dav;
}

location /.well-known/caldav {
    return 301 $scheme://$host/remote.php/dav;
}

location /.well-known/webfinger {
    return 301 $scheme://$host/index.php/.well-known/webfinger;
}

location /.well-known/nodeinfo {
    return 301 $scheme://$host/index.php/.well-known/nodeinfo;
}
APCu Setting
nano /etc/php/8.2/mods-available/apcu.ini
apc.enable_cli=1
Ländercode
in die /var/www/nextcloud/config/config.php folgende Zeile ans Ende hinzufügen:
'default_phone_region' = 'DE', Redis installieren
Cache Memory
Dazu redis installieren
sudo apt install redisDatei /etc/redis/redis.conf bearbeiten
# port 6379 ändern auf
port 0

# unixsocket aktivieren durch entfernen der #
unixsocket /var/run/redis/redis.sock
unixsocketperm 770 # ACHTUNG! Berechtigung ändern!
User Redis zur gruppe hinzufügen
usermod -a -G redis www-dataopcache buffer fehler
cd /etc/php/8.x/apache2/php.ini

# suche nach opcache.interned_strings_buffer
# ; entfernen und 16 daraus machen
Apache neustarten
service apache2 restart
service redis-server start
var/www/nextcloud/config/config.php anpassen und folgendes ans Ende hinzufügen
  "default_language" => "de",
  "default_locale" => "de",
  'default_phone_region' => 'DE',
  'skeletondirectory' => '',
  "loglevel" => 3,
  'filelocking.enabled' => 'true',
  'memcache.local' => '\OC\Memcache\APCu',
  'memcache.locking' => '\OC\Memcache\Redis',
  'redis' => array(
     'host' => '/var/run/redis/redis.sock',
     'port' => 0,
     'timeout' => 0.0,
      ),
Autostart von Redis aktivieren
systemctl enable redis-serverServer Neustart
rebootNextcloud cronjob
crontab -u www-data -e
*/5  *  *  *  * php -f /var/www/nextcloud/cron.php
.htaccess fehler
einfach den Ordner ocm-provider aus dem Backup in Ordner /var/www/nextcloud kopieren
Nextcloud Update auf Version 25
Das Update von 24 auf 25 richtig ausführen
Wichtig: Es sollten keine Warnungen angezeigt werden. Das Update am besten über die Console ausführen
Vorher Backup nicht vergessen!
Befehle
cd /var/www/nextcloud

sudo -u www-data php updater/updater.phar
Ist das Update erfolgreich durchgelaufen muss man noch die Datenbank aktualisieren. Der Befehl ist zu finden im Adminaccount unter Einstellungen > Übersicht. Die genau Syntax lautet:
# der Befehl muss im Ordner /var/www/nextcloud ausgeführt werden (oder wo die Nextcloud installiert ist)

sudo -u www-data php occ db:add-missing-indices
Nextcloud VM oder VM Container mit NAS verbinden
Ein Container muss ein Privileged Container sein und SMB und FUSE in den Optionen aktivieren
Ideal für Backups oder zum einbinden eines Netzlaufwerks
##### mount smb share linux ####

## install cifs utils ##
apt install cifs-utils

## Credentials anlegen
nano /root/.smbcredentials

## create credentials file ##
username=shareuser
password=sharepassword
domain=domain_or_workgroupname

## secure the file ##
chmod 0600 /root/.smbcredentials

## edit fstab ##
//10.1.1.10/pxxData/ncbackup /mnt/smb-ds cifs uid=1000,gid=1000,rw,user,credentials=/root/.smbcredentials 0 0

## mount it ##
mount -a
Anzeigen der Festplatten inklusive smb share
df -Th
Nextcloud Backup
Ordner zu sichern
- Nextcloud Datenverzeichnis
- Nextclud Config-Verzeichnis
- Nextcloud Datenbank Dump
Backup-Skript erstellen
nano nc-backup.sh
Zugriffsrechte anpassen
chown root nc-backup.sh
chmod 0700 nc-backup.sh
Skript ausführen (wenn erstellt)
./nc-backup.sh
NC-restore.sh erstellen
nano nc-resetore.sh
Zugriffsrechte anpassen
chown root nc-restore.sh
chmod 0700 nc-restore.sh
Nextcloud aus Backup zurückspielen
./nc-restore.sh ordnerbezeichnung
Skripte
Backup Skript
Bei # TODO sind Anpassungen zu tätigen
#!/bin/bash

#
# Bash script for creating backups of Nextcloud.
#
# Version 2.0.0
#
# Usage:
# 	- With backup directory specified in the script:  ./NextcloudBackup.sh
# 	- With backup directory specified by parameter: ./NextcloudBackup.sh <BackupDirectory> (e.g. ./NextcloudBackup.sh /media/hdd/nextcloud_backup)
#
# The script is based on an installation of Nextcloud using nginx and MariaDB, see https://decatec.de/home-server/nextcloud-auf-ubuntu-server-18-04-lts-mit-nginx-mariadb-php-lets-encrypt-redis-und-fail2ban/
#

#
# IMPORTANT
# You have to customize this script (directories, users, etc.) for your actual environment.
# All entries which need to be customized are tagged with "TODO".
#

# Variables
backupMainDir=$1

if [ -z "$backupMainDir" ]; then
	# TODO: The directory where you store the Nextcloud backups (when not specified by args)
    backupMainDir='/media/hdd/nextcloud_backup'
fi

currentDate=$(date +"%Y%m%d_%H%M%S")

# The actual directory of the current backup - this is a subdirectory of the main directory above with a timestamp
backupdir="${backupMainDir}/${currentDate}/"

# TODO: The directory of your Nextcloud installation (this is a directory under your web root)
nextcloudFileDir='/var/www/nextcloud'

# TODO: The directory of your Nextcloud data directory (outside the Nextcloud file directory)
# If your data directory is located under Nextcloud's file directory (somewhere in the web root), the data directory should not be a separate part of the backup
nextcloudDataDir='/var/nextcloud_data'

# TODO: The directory of your Nextcloud's local external storage.
# Uncomment if you use local external storage.
#nextcloudLocalExternalDataDir='/var/nextcloud_external_data'

# TODO: The service name of the web server. Used to start/stop web server (e.g. 'systemctl start <webserverServiceName>')
webserverServiceName='nginx'

# TODO: Your web server user
webserverUser='www-data'

# TODO: The name of the database system (one of: mysql, mariadb, postgresql)
databaseSystem='mariadb'

# TODO: Your Nextcloud database name
nextcloudDatabase='nextcloud_db'

# TODO: Your Nextcloud database user
dbUser='nextcloud_db_user'

# TODO: The password of the Nextcloud database user
dbPassword='mYpAsSw0rd'

# TODO: The maximum number of backups to keep (when set to 0, all backups are kept)
maxNrOfBackups=0

# TODO: Ignore updater's backup directory in the data directory to save space
# Set to true to ignore the backup directory
ignoreUpdaterBackups=false

# File names for backup files
# If you prefer other file names, you'll also have to change the NextcloudRestore.sh script.
fileNameBackupFileDir='nextcloud-filedir.tar.gz'
fileNameBackupDataDir='nextcloud-datadir.tar.gz'

# TODO: Uncomment if you use local external storage
#fileNameBackupExternalDataDir='nextcloud-external-datadir.tar.gz'

fileNameBackupDb='nextcloud-db.sql'

# Function for error messages
errorecho() { cat <<< "$@" 1>&2; }

function DisableMaintenanceMode() {
	echo "Switching off maintenance mode..."
	sudo -u "${webserverUser}" php ${nextcloudFileDir}/occ maintenance:mode --off
	echo "Done"
	echo
}

# Capture CTRL+C
trap CtrlC INT

function CtrlC() {
	read -p "Backup cancelled. Keep maintenance mode? [y/n] " -n 1 -r
	echo

	if ! [[ $REPLY =~ ^[Yy]$ ]]
	then
		DisableMaintenanceMode
	else
		echo "Maintenance mode still enabled."
	fi

	echo "Starting web server..."
	systemctl start "${webserverServiceName}"
	echo "Done"
	echo

	exit 1
}

#
# Print information
#
echo "Backup directory: ${backupMainDir}"

#
# Check for root
#
if [ "$(id -u)" != "0" ]
then
	errorecho "ERROR: This script has to be run as root!"
	exit 1
fi

#
# Check if backup dir already exists
#
if [ ! -d "${backupdir}" ]
then
	mkdir -p "${backupdir}"
else
	errorecho "ERROR: The backup directory ${backupdir} already exists!"
	exit 1
fi

#
# Set maintenance mode
#
echo "Set maintenance mode for Nextcloud..."
sudo -u "${webserverUser}" php ${nextcloudFileDir}/occ maintenance:mode --on
echo "Done"
echo

#
# Stop web server
#
echo "Stopping web server..."
systemctl stop "${webserverServiceName}"
echo "Done"
echo

#
# Backup file directory
#
echo "Creating backup of Nextcloud file directory..."
tar -cpzf "${backupdir}/${fileNameBackupFileDir}" -C "${nextcloudFileDir}" .
echo "Done"
echo

#
# Backup data directory
#
echo "Creating backup of Nextcloud data directory..."

if [ "$ignoreUpdaterBackups" = true ] ; then
        echo "Ignoring updater backup directory"
        tar -cpzf "${backupdir}/${fileNameBackupDataDir}"  --exclude="updater-*/backups/*" -C "${nextcloudDataDir}" .
else
        tar -cpzf "${backupdir}/${fileNameBackupDataDir}"  -C "${nextcloudDataDir}" .
fi

echo "Done"
echo

# Backup local external storage.
# Uncomment if you use local external storage
#echo "Creating backup of Nextcloud local external storage directory..."
#tar -cpzf "${backupdir}/${fileNameBackupExternalDataDir}"  -C "${nextcloudLocalExternalDataDir}" .
#echo "Done"
#echo

#
# Backup DB
#
if [ "${databaseSystem,,}" = "mysql" ] || [ "${databaseSystem,,}" = "mariadb" ]; then
  	echo "Backup Nextcloud database (MySQL/MariaDB)..."

	if ! [ -x "$(command -v mysqldump)" ]; then
		errorecho "ERROR: MySQL/MariaDB not installed (command mysqldump not found)."
		errorecho "ERROR: No backup of database possible!"
	else
		mysqldump --single-transaction -h localhost -u "${dbUser}" -p"${dbPassword}" "${nextcloudDatabase}" > "${backupdir}/${fileNameBackupDb}"
	fi

	echo "Done"
	echo
elif [ "${databaseSystem,,}" = "postgresql" ] || [ "${databaseSystem,,}" = "pgsql" ]; then
	echo "Backup Nextcloud database (PostgreSQL)..."

	if ! [ -x "$(command -v pg_dump)" ]; then
		errorecho "ERROR: PostgreSQL not installed (command pg_dump not found)."
		errorecho "ERROR: No backup of database possible!"
	else
		PGPASSWORD="${dbPassword}" pg_dump "${nextcloudDatabase}" -h localhost -U "${dbUser}" -f "${backupdir}/${fileNameBackupDb}"
	fi

	echo "Done"
	echo
fi

#
# Start web server
#
echo "Starting web server..."
systemctl start "${webserverServiceName}"
echo "Done"
echo

#
# Disable maintenance mode
#
DisableMaintenanceMode

#
# Delete old backups
#
if [ ${maxNrOfBackups} != 0 ]
then
	nrOfBackups=$(ls -l ${backupMainDir} | grep -c ^d)

	if [[ ${nrOfBackups} > ${maxNrOfBackups} ]]
	then
		echo "Removing old backups..."
		ls -t ${backupMainDir} | tail -$(( nrOfBackups - maxNrOfBackups )) | while read -r dirToRemove; do
			echo "${dirToRemove}"
			rm -r "${backupMainDir}/${dirToRemove:?}"
			echo "Done"
			echo
		done
	fi
fi

echo
echo "DONE!"
echo "Backup created: ${backupdir}"
Restore Skript
Bei # Todo sind Anpassungen zu tätigen
#!/bin/bash

#
# Bash script for restoring backups of Nextcloud.
#
# Version 2.0.0
#
# Usage:
#   - With backup directory specified in the script: ./NextcloudRestore.sh <BackupName> (e.g. ./NextcloudRestore.sh 20170910_132703)
#   - With backup directory specified by parameter: ./NextcloudRestore.sh <BackupName> <BackupDirectory> (e.g. ./NextcloudRestore.sh 20170910_132703 /media/hdd/nextcloud_backup)


#
# IMPORTANT
# You have to customize this script (directories, users, etc.) for your actual environment.
# All entries which need to be customized are tagged with "TODO".
#

# Variables
restore=$1
backupMainDir=$2

if [ -z "$backupMainDir" ]; then
	# TODO: The directory where you store the Nextcloud backups (when not specified by args)
    backupMainDir='/media/hdd/nextcloud_backup'
fi

echo "Backup directory: $backupMainDir"

currentRestoreDir="${backupMainDir}/${restore}"

# TODO: The directory of your Nextcloud installation (this is a directory under your web root)
nextcloudFileDir='/var/www/nextcloud'

# TODO: The directory of your Nextcloud data directory (outside the Nextcloud file directory)
# If your data directory is located under Nextcloud's file directory (somewhere in the web root), the data directory should not be restored separately
nextcloudDataDir='/var/nextcloud_data'

# TODO: The directory of your Nextcloud's local external storage.
# Uncomment if you use local external storage.
#nextcloudLocalExternalDataDir='/var/nextcloud_external_data'

# TODO: The service name of the web server. Used to start/stop web server (e.g. 'systemctl start <webserverServiceName>')
webserverServiceName='nginx'

# TODO: Your web server user
webserverUser='www-data'

# TODO: The name of the database system (one of: mysql, mariadb, postgresql)
databaseSystem='mariadb'

# TODO: Your Nextcloud database name
nextcloudDatabase='nextcloud_db'

# TODO: Your Nextcloud database user
dbUser='nextcloud_db_user'

# TODO: The password of the Nextcloud database user
dbPassword='mYpAsSw0rd'

# File names for backup files
# If you prefer other file names, you'll also have to change the NextcloudBackup.sh script.
fileNameBackupFileDir='nextcloud-filedir.tar.gz'
fileNameBackupDataDir='nextcloud-datadir.tar.gz'

# TODO: Uncomment if you use local external storage
#fileNameBackupExternalDataDir='nextcloud-external-datadir.tar.gz'

fileNameBackupDb='nextcloud-db.sql'

# Function for error messages
errorecho() { cat <<< "$@" 1>&2; }

#
# Check if parameter(s) given
#
if [ $# != "1" ] && [ $# != "2" ]
then
    errorecho "ERROR: No backup name to restore given, or wrong number of parameters!"
    errorecho "Usage: NextcloudRestore.sh 'BackupDate' ['BackupDirectory']"
    exit 1
fi

#
# Check for root
#
if [ "$(id -u)" != "0" ]
then
    errorecho "ERROR: This script has to be run as root!"
    exit 1
fi

#
# Check if backup dir exists
#
if [ ! -d "${currentRestoreDir}" ]
then
	errorecho "ERROR: Backup ${restore} not found!"
    exit 1
fi

#
# Check if the commands for restoring the database are available
#
if [ "${databaseSystem,,}" = "mysql" ] || [ "${databaseSystem,,}" = "mariadb" ]; then
    if ! [ -x "$(command -v mysql)" ]; then
		errorecho "ERROR: MySQL/MariaDB not installed (command mysql not found)."
		errorecho "ERROR: No restore of database possible!"
        errorecho "Cancel restore"
        exit 1
    fi
elif [ "${databaseSystem,,}" = "postgresql" ] || [ "${databaseSystem,,}" = "pgsql" ]; then
    if ! [ -x "$(command -v psql)" ]; then
		errorecho "ERROR: PostgreSQL not installed (command psql not found)."
		errorecho "ERROR: No restore of database possible!"
        errorecho "Cancel restore"
        exit 1
	fi
fi

#
# Set maintenance mode
#
echo "Set maintenance mode for Nextcloud..."
sudo -u "${webserverUser}" php ${nextcloudFileDir}/occ maintenance:mode --on
echo "Done"
echo

#
# Stop web server
#
echo "Stopping web server..."
systemctl stop "${webserverServiceName}"
echo "Done"
echo

#
# Delete old Nextcloud directories
#

# File directory
echo "Deleting old Nextcloud file directory..."
rm -r "${nextcloudFileDir}"
mkdir -p "${nextcloudFileDir}"
echo "Done"
echo

# Data directory
echo "Deleting old Nextcloud data directory..."
rm -r "${nextcloudDataDir}"
mkdir -p "${nextcloudDataDir}"
echo "Done"
echo

# Local external storage
# TODO: Uncomment if you use local external storage
#echo "Deleting old Nextcloud local external storage directory..."
#rm -r "${nextcloudLocalExternalDataDir}"
#mkdir -p "${nextcloudLocalExternalDataDir}"
#echo "Done"
#echo

#
# Restore file and data directory
#

# File directory
echo "Restoring Nextcloud file directory..."
tar -xmpzf "${currentRestoreDir}/${fileNameBackupFileDir}" -C "${nextcloudFileDir}"
echo "Done"
echo

# Data directory
echo "Restoring Nextcloud data directory..."
tar -xmpzf "${currentRestoreDir}/${fileNameBackupDataDir}" -C "${nextcloudDataDir}"
echo "Done"
echo

# Local external storage
# TODO: Uncomment if you use local external storage
#echo "Restoring Nextcloud data directory..."
#tar -xmpzf "${currentRestoreDir}/${fileNameBackupExternalDataDir}" -C "${nextcloudLocalExternalDataDir}"
#echo "Done"
#echo

#
# Restore database
#
echo "Dropping old Nextcloud DB..."

if [ "${databaseSystem,,}" = "mysql" ] || [ "${databaseSystem,,}" = "mariadb" ]; then
    mysql -h localhost -u "${dbUser}" -p"${dbPassword}" -e "DROP DATABASE ${nextcloudDatabase}"
elif [ "${databaseSystem,,}" = "postgresql" ]; then
	sudo -u postgres psql -c "DROP DATABASE ${nextcloudDatabase};"
fi

echo "Done"
echo

echo "Creating new DB for Nextcloud..."

if [ "${databaseSystem,,}" = "mysql" ] || [ "${databaseSystem,,}" = "mariadb" ]; then
    # Use this if the databse from the backup uses UTF8 with multibyte support (e.g. for emoijs in filenames):
    mysql -h localhost -u "${dbUser}" -p"${dbPassword}" -e "CREATE DATABASE ${nextcloudDatabase} CHARACTER SET utf8mb4 COLLATE utf8mb4_general_ci"
    # TODO: Use this if the database from the backup DOES NOT use UTF8 with multibyte support (e.g. for emoijs in filenames):
    #mysql -h localhost -u "${dbUser}" -p"${dbPassword}" -e "CREATE DATABASE ${nextcloudDatabase}"
elif [ "${databaseSystem,,}" = "postgresql" ] || [ "${databaseSystem,,}" = "pgsql" ]; then
    sudo -u postgres psql -c "CREATE DATABASE ${nextcloudDatabase} WITH OWNER ${dbUser} TEMPLATE template0 ENCODING \"UTF8\";"
fi

echo "Done"
echo

echo "Restoring backup DB..."

if [ "${databaseSystem,,}" = "mysql" ] || [ "${databaseSystem,,}" = "mariadb" ]; then
	mysql -h localhost -u "${dbUser}" -p"${dbPassword}" "${nextcloudDatabase}" < "${currentRestoreDir}/${fileNameBackupDb}"
elif [ "${databaseSystem,,}" = "postgresql" ] || [ "${databaseSystem,,}" = "pgsql" ]; then
	sudo -u postgres psql "${nextcloudDatabase}" < "${currentRestoreDir}/${fileNameBackupDb}"
fi

echo "Done"
echo

#
# Start web server
#
echo "Starting web server..."
systemctl start "${webserverServiceName}"
echo "Done"
echo

#
# Set directory permissions
#
echo "Setting directory permissions..."
chown -R "${webserverUser}":"${webserverUser}" "${nextcloudFileDir}"
chown -R "${webserverUser}":"${webserverUser}" "${nextcloudDataDir}"
# TODO: Uncomment if you use local external storage
#chown -R "${webserverUser}":"${webserverUser}" "${nextcloudLocalExternalDataDir}"
echo "Done"
echo

#
# Update the system data-fingerprint (see https://docs.nextcloud.com/server/latest/admin_manual/configuration_server/occ_command.html#maintenance-commands-label)
#
echo "Updating the system data-fingerprint..."
sudo -u "${webserverUser}" php ${nextcloudFileDir}/occ maintenance:data-fingerprint
echo "Done"
echo

#
# Disbale maintenance mode
#
echo "Switching off maintenance mode..."
sudo -u "${webserverUser}" php ${nextcloudFileDir}/occ maintenance:mode --off
echo "Done"
echo

echo
echo "DONE!"
echo "Backup ${restore} successfully restored."
Nextcloud PHP configuration
Bei Problemen mit PHP kann es sein, dass man auf eine andere Version umstellen muss.
run
php -v
es wird die aktuelle Version von PHP angezeigt.run
sudo update-alternatives --config phphier kann man die Version auswählen, die installiert sind
run
php -vnochmal und schau ob die neue Version übernommen ist.cron.php sollte danach wieder funktionieren.
Switch to PHP 8.2
Genau so kann zu PHP8.1 oder anderen Versionen gewechselt werden. Dazu die entsprechende Version angeben.
Before switching to PHP 8.2, you have to deactivate the previously activated Apache module. The following commands will deactivate the already activated Apache module and then activate PHP 8.2 Apache module. Then the next commands will set PHP 8.2 as the default version for the command line interface (CLI).
- Apache:
sudo a2dismod php* sudo a2enmod php8.2 sudo systemctl restart apache2 - Command line interface:
sudo update-alternatives --set php /usr/bin/php8.2
sudo update-alternatives --set phar /usr/bin/phar8.2
sudo update-alternatives --set phar.phar /usr/bin/phar.phar8.2
sudo update-alternatives --set phpize /usr/bin/phpize8.2
sudo update-alternatives --set php-config /usr/bin/php-config8.2
Allgemeine Nextcloud Befehle
Bereinigen von Papierkörben
sudo -u www-data php occ trashbin:cleanup --all-users
Nextcloud auf anderen Server umziehen
Der Server muss genau so installiert werden wie der Originale Server danach foldgende Befehle ausführen.
Apfelcast hat das in seinem Patreon Profil
##### Nextcloud Umzug durchführen #####

### Vorbereitung ###
- LAMP Stack installieren
- Alle Zusatzressourcen installieren (Redis, etc.)

## 1. Nextcloud stoppen ##
cd /var/www/nextcloud/
sudo -u www-data php occ maintenance:mode --on

## 2. Datenbank Dump auf alten Server durchführen ##

mkdir /mnt/backup
cd /mnt/backup

mysqldump --single-transaction -h localhost -u nextclouduser -p nextcloud > nextcloud_db_backup.bak

## 3. Nextcloud Verzeichnis kopieren ##
rsync -r -av -P /quelle 12.123.42.95:/ziel

## 4. Nextcloud Daten kopieren ##
rsync -r -av -P /quelle 12.123.42.95:/ziel

## 5. Datenbank auf neuem Server erstellen ##

create database nextcloud_db;
create user nextcloud_db_user@localhost identified by 'MeInPasSw0rT';
grant all privileges on nextcloud_db.* to nextcloud_db_user@localhost;
flush privileges;
exit;

## 6. Neue Datenbank importeieren ##
cd /mnt/backup
mysql -h localhost -u nextclouduser -p nextcloud < nextcloud_db_backup.bak

## 7. apache .conf auf neuem Server erstellen ##
nano /etc/apache2/sites-available/nextcloud.conf

a2ensite nextcloud.conf
service apache2 restart

## 8. SSL Zertifikat erstellen ##
certbot --apache -d

## 9. Zugriffsrechte anpassen ##
chown -R www-data:www-data /home/data/

chown -R www-data:www-data /var/www/nextcloud/
chmod -R 755 /var/www/nextcloud/

## 10. config.php überprüfen ##

## 11. Nextcloud online schalten ##
cd /var/www/nextcloud/
sudo -u www-data php occ maintenance:mode --off
External Storage auf Nextcloud
[Bug]: Can't save global credentials in external storage · Issue #49829 · nextcloud/server
Using the occ command — Nextcloud latest Administration Manual latest documentation
Files external
These commands are used for managing Nextcloud’s External Storage feature. In addition to replicating the configuration capabilities in the Web UI, additional capabilities include exporting / importing configurations, scanning External Storage mounts that require login credentials, and configuring update notifications (if supported by the storage type).
Note
These commands are only available when the “External storage support” app (files_external) is enabled.
Available commands for the “files_external” namespace:
files_external:applicable  Manage applicable users and groups for a mount
files_external:backends    Show available authentication and storage backends
files_external:config      Manage backend configuration for a mount
files_external:create      Create a new mount configuration
files_external:delete      Delete an external mount
files_external:export      Export mount configurations
files_external:import      Import mount configurations
files_external:list        List configured admin or personal mounts
files_external:notify      Listen for active update notifications for a configured external mount
files_external:option      Manage mount options for a mount
files_external:scan        Scan an external storage for changed files
files_external:verify      Verify mount configuration
files_external:scan provides the ability to provide a username and/or password for cases where login credentials are used.
Use files_external:export to export all admin mounts to stdout, and files_external:export [user_id] to export the mounts of the specified Nextcloud user.
Use files_external:import [filename] to import legacy JSON configurations, and to copy external mount configurations to another Nextcloud server.
Beispiel
Hello ![]() I Could solve my Issue using this solution (Thanks to jtr) :
I Could solve my Issue using this solution (Thanks to jtr) :
Connect to your VM (Shell Linux) hosting your NextCloud. Use SU.
Go to the Folder hosting NextCloud with the occ file. (This step should look evidence for everyone , but I am Noob hahaha, I give advices for Noob ![]() )
)
And write this :
Here , you can do this :
sudo -u www-data php occ files_external:list
You can see the bad External Drives and delete it with :
sudo -u www-data php occ files_external:delete X
Then , you can re-create good ones by using this command :
sudo -u www-data php occ files_external:create Blabla ‘sfpt’ password::password -c host=X.X.X.X -c share=/X/ -c root=/X/ -c domain=workgroup -c user=X -c password=X
Replace : X with Yours ![]()
Have a nice day ![]()