Eigene Cloud
- Adguard
- Bookstack
- FreshRSS
- piHole installieren
- Openproject
- Paperless
- Umbrel
- Vaultwarden (Bitwarden) installieren
- Sterling PDF
Adguard
Einstellungen Adguard
DNS Einstellungen
https://dns.quad9.net/dns-query
tls://dns2.digitalcourage.de
tls://fdns1.dismail.de
tls://dnsforge.de
Befehle in Konsole
./AdGuardHome -s -h #Hilfe Bookstack
Docker Container
Watchtower läuft
Allerdings wird Bookstack selbst nicht upgedated.
Installieren
Bookstack ist ein leistungsstarkes OpenSource Wiki und kann leicht in einem Docker Container betrieben werden.
Installieren von BookStack
Installation · BookStack (bookstackapp.com)
# Ensure you have read the above information about what this script does before executing these commands.

# Download the script
wget https://raw.githubusercontent.com/BookStackApp/devops/main/scripts/installation-ubuntu-24.04.sh

# Make it executable
chmod a+x installation-ubuntu-22.04.sh

# Run the script with admin permissions
sudo ./installation-ubuntu-22.04.sh
Updating BookStack
BookStack is updated regularly. We try our best to keep the platform and upgrade path as stable as possible. The latest release can be found on GitHub here and detailed information on releases is posted on the BookStack blog here.
Before updating you should back up the database and any file uploads to prevent potential data loss.
Backup and restore documentation can be found here.
Updating is currently done via Git version control. To update BookStack you can run the three following commands in the root directory of the application:
git pull origin release
composer install --no-dev
php artisan migrate
This first command will update the repository that was created in the installation. The second will install the PHP dependencies using composer. The third will then update the database with any required changes.
In addition, Clearing the system caches is also recommended:
php artisan cache:clear
php artisan config:clear
php artisan view:clear
Check the below Version Specific Instructions list for the version you are updating to for any additional instructions.
When running update commands, your command line user will need permission to handle the required files and folders in the BookStack installation folder. You can find more details about required filesystem permissions here.
Backup
BookStack does not currently have a built-in way to backup and restore but it can be done via the command line fairly simply.
Please note the below commands are based on using Ubuntu. If you are using a different operating system you may have to alter these commands to suit.
Backup
There are two types of content you need to backup: Files and database records.
Database
The easiest way to backup the database is via mysqldump:
# Syntax
## Only specify the `-p` option if the user provided has a password
mysqldump -u {mysql_user} -p {database_name} > {output_file_name}


# Example
mysqldump -u benny bookstack > bookstack.backup.sql
If you are using MySQL on Ubuntu, and are using the root MySQL user, you will likely have to run the command above with sudo:
sudo mysqldump -u root bookstack > bookstack.backup.sql
The resulting file (bookstack.backup.sql in the examples above) will contain all the data from the database you specified. Copy this file to somewhere safe, ideally on a different device.
Files
Below is a list of files and folders containing data you should back up. The paths are shown relative to the root BookStack folder.
.env- File, Contains important configuration information.public/uploads- Folder, Contains any uploaded images (If not using amazon s3).storage/uploads- Folder, Contains uploaded page attachments (Only exists as of BookStack v0.13).
Alternatively you could backup up your whole BookStack folder but only the above are non-restorable.
The following command will create a compressed archive of the above folders and files:
tar -czvf bookstack-files-backup.tar.gz .env public/uploads storage/uploads
The resulting file (bookstack-files-backup.tar.gz) will contain all your file data. Copy this to a safe place, ideally on a different device.
Restore
If you are restoring from scratch follow the installation instructions first to get a new BookStack instance set-up. Do not run the php artisan migrate installation step when installing BookStack. You may need to comment this command out if using an installer script. If using a docker container, restore the database before running the BookStack container. Once you are sure the new instance is set-up follow the instructions below.
Database
To restore the database you simply need to execute the sql in the output file from the mysqldump you performed above. To do this copy your database SQL backup file onto the BookStack or database host machine and run the following:
# Syntax
mysql -u {mysql_user} -p {database_name} < {backup_file_name}
## Only specify the -p if the user provided has a password

# Example
mysql -u benny -p bookstack < bookstack.backup.sql

# If using the root user on Ubuntu you may
# have to run the above with root permissions via sudo:
sudo mysql -u root bookstack < bookstack.backup.sql
If you are restoring to a new version of BookStack you will have to run php artisan migrate after restore to perform any required updates to the database.
Files
To restore the files you simply need to copy them from the backup archive back to their original locations. If you created a compressed bookstack-files-backup.tar.gz archive as per the backup instructions above you can simply copy that file to your BookStack folder then run the following command:
tar -xvzf bookstack-files-backup.tar.gz
If you get errors during the above command it may be due to permissions. Change permissions so you can write to the restore locations.
After a backup of the files you should reset the permissions to ensure any write-required locations are writable by the server. The locations required for this can be found in the installation instructions.
FreshRSS
https://github.com/FreshRSS/FreshRSS/tree/edge/Docker
Deploy FreshRSS with Docker
FreshRSS is a self-hosted RSS feed aggregator.
- Official website:
freshrss.org - Official Docker images:
hub.docker.com/r/freshrss/freshrss - Repository:
github.com/FreshRSS/FreshRSS - Documentation:
freshrss.github.io/FreshRSS - License: GNU AGPL 3

Install Docker
See https://docs.docker.com/get-docker/
Example for Linux Debian / Ubuntu:
# Install default Docker Compose and automatically the corresponding version of Docker
apt install docker-compose-v2
Quick run
Example running FreshRSS (or scroll down to the Docker Compose section instead):
docker run -d --restart unless-stopped --log-opt max-size=10m \
  -p 8080:80 \
  -e TZ=Europe/Paris \
  -e 'CRON_MIN=1,31' \
  -v freshrss_data:/var/www/FreshRSS/data \
  -v freshrss_extensions:/var/www/FreshRSS/extensions \
  --name freshrss \
  freshrss/freshrss
- Exposing on port 8080
- With a server timezone (default is
UTC) - With an automatic cron job to refresh feeds
- Saving FreshRSS data in a Docker volume
freshrss_dataand optional extensions infreshrss_extensions - Using the default image, which is the latest stable release
Complete installation
Browse to your server https://freshrss.example.net/ to complete the installation via the FreshRSS Web interface, or use the command line described below.
Command line
See the CLI documentation for all the commands, which can be applied like:
docker exec --user www-data freshrss cli/list-users.php
Example of installation via command line:
docker exec --user www-data freshrss cli/do-install.php --default_user freshrss

docker exec --user www-data freshrss cli/create-user.php --user freshrss --password freshrss
ℹ️ You have to replace
--user www-databy--user apachewhen using our images based on Linux Alpine.
Our Docker image variants
:latest(default) is the latest stable release:edgeis the rolling release, same than our gitedgebranch:x.y.ztags correspond to specific FreshRSS releases, allowing you to target a precise version for deployment:xtags track the latest release within a major version series. For instance,:1will update to include any1.xreleases, but will exclude versions beyond2.x*-alpineuse Linux Alpine as base-image instead of Debian- Our Docker images are designed with multi-architecture support, accommodating a variety of Linux platforms including
linux/arm/v7,linux/arm64, andlinux/amd64.- For other platforms, see the custom build section
Linux: Debian vs. Alpine
Our default image is based on Debian. We offer an alternative based on Alpine (with the *-alpine tag suffix). In our tests (2019), Alpine was slower, while Alpine is smaller on disk (and much faster to build), and with newer packages in general (Apache, PHP).
ℹ️ For some rare systems, one variant might work but not the other, for instance due to kernel incompatibilities.
Environment variables
TZ: (default isUTC) A server timezoneCRON_MIN: (default is disabled) Define minutes for the built-in cron job to automatically refresh feeds (see below for more advanced options)DATA_PATH: (default is empty, defined by./constants.local.phpor./constants.php) Defines the path for writeable data.FRESHRSS_ENV: (default isproduction) Enables additional development information if set todevelopment(increases the level of logging and ensures that errors are displayed) (see below for more development options)COPY_LOG_TO_SYSLOG: (default isOn) Copy all the logs to syslogCOPY_SYSLOG_TO_STDERR: (default isOn) Copy syslog to Standard Error so that it is visible in docker logsLISTEN: (default is80) Modifies the internal Apache listening address and port, e.g.0.0.0.0:8080(for advanced users; useful for Docker host networking)FRESHRSS_INSTALL: automatically pass arguments to command linecli/do-install.php(for advanced users; see example in Docker Compose section). Only executed at the very first run (so far), so if you make any change, you need to delete yourfreshrssservice,freshrss_datavolume, before running again.FRESHRSS_USER: automatically pass arguments to command linecli/create-user.php(for advanced users; see example in Docker Compose section). Only executed at the very first run (so far), so if you make any change, you need to delete yourfreshrssservice,freshrss_datavolume, before running again.
How to update
# Rebuild an image (see build section below) or get a new online version:
docker pull freshrss/freshrss
# And then
docker stop freshrss
docker rename freshrss freshrss_old
# See the run section above for the full command
docker run ... --name freshrss freshrss/freshrss
# If everything is working, delete the old container
docker rm freshrss_old
piHole installieren
Avahi installieren
# Avahi installieren

apt-get install avahi-daemon

# Hosts Datei anpassen

nano /etc/hosts

### Eintragen

# Als zweite Zeile
127.0.0.1 phihole.local

# und in PVE
pihole.local abändern
Repository hinzufügen
apt install software-properties-commonPiHole installieren
curl -sSL https://install.pi-hole.net | bashUnbound installieren
https://docs.pi-hole.net/guides/dns/unbound/
>
We will use unbound, a secure open-source recursive DNS server primarily developed by NLnet Labs, VeriSign Inc., Nominet, and Kirei. The first thing you need to do is to install the recursive DNS resolver:
sudo apt install unbound
If you are installing unbound from a package manager, it should install the root.hints file automatically with the dependency dns-root-data. The root hints will then be automatically updated by your package manager.
Optional: Download the current root hints file (the list of primary root servers which are serving the domain "." - the root domain). Update it roughly every six months. Note that this file changes infrequently. This is only necessary if you are not installing unbound from a package manager. If you do this optional step, you will need to uncomment the root-hints: configuration line in the suggested config file.
wget https://www.internic.net/domain/named.root -qO- | sudo tee /var/lib/unbound/root.hints
Konfiguration von pihole.conf
Für DNS over TLS
/etc/unbound/unbound.conf.d/pi-hole.conf
server:
    use-syslog: yes
    do-daemonize: no
    interface: 127.0.0.1
    port: 5335
    access-control: 127.0.0.0/8 allow
    cache-min-ttl: 3600
    cache-max-ttl: 86400
    prefetch: yes
    qname-minimisation: yes
    harden-below-nxdomain: yes
    harden-referral-path: yes

forward-zone:
    name: "."
    forward-tls-upstream: yes
    forward-addr: 194.242.2.3@853  # Mullvad
    forward-addr: 94.140.14.14@853  # Adguard
Nahc dem ändern mit sudo systemctl restart unbound neu starten
Openproject
Installation
Update the apt package index and install packages to allow apt to use a repository over HTTPS:
sudo apt-get update
sudo apt-get install apt-transport-https ca-certificates wget
Import the PGP key used to sign our packages:
wget -qO- https://dl.packager.io/srv/opf/openproject/key | sudo apt-key add -Note: you might get a warning when importing the key Warning: apt-key is deprecated. Manage keyring files in trusted.gpg.d instead (see apt-key(8)). This happens because APT has updated the way it manages signing keys, and the package provider is not supporting the new way yet.
Add the OpenProject package source:
sudo wget -O /etc/apt/sources.list.d/openproject.list \
  https://dl.packager.io/srv/opf/openproject/stable/12/installer/ubuntu/22.04.repo
Download the OpenProject package:
sudo apt-get update
sudo apt-get install openproject
Update
sudo apt-get update --allow-releaseinfo-change
sudo apt-get update
sudo apt-get install --only-upgrade openproject
sudo openproject configure
On Ubuntu 22.04., you might see warnings like these:
W: https://dl.packager.io/srv/deb/opf/openproject/stable/12/ubuntu/dists/22.04/InRelease: Key is stored in legacy trusted.gpg keyring (/etc/apt/trusted.gpg), see the DEPRECATION section in apt-key(8) for details.
This message is due to Ubuntu 22.04 switching to a more secure way of adding repository sources, which is not yet supported by the repository provider. There is ongoing work on this item, the message is for information only.
If you get an error like the following:
E: Repository ‘https://dl.packager.io/srv/deb/opf/openproject/stable/12/ubuntu 22.04 InRelease’ changed its ‘Origin’ value from ‘’ to ‘https://packager.io/gh/opf/openproject’ E: Repository ‘https://dl.packager.io/srv/deb/opf/openproject/stable/12/ubuntu 22.04 InRelease’ changed its ‘Label’ value from ‘’ to ‘Ubuntu 22.04 packages for opf/openproject’
These two messages messages are expected, due to a change in Origin and Label repository metadata, to better explain what the repository is about. You should allow the change, and/or run sudo apt-get update --allow-releaseinfo-change for the update to go through.
Konfiguration
nano /etc/openproject/conf.d/server

Server-Adresse: "0penpr.hhml.selfhost.co"
Export ... = "https"
Außerdem in den Admineinstellungen die URL ändern.
Paperless
Paperless installation
Vorbereitung
- Docker installieren und Docker Compose
- Vorbereitungen treffen
# User Anlegen:
adduser paperless

# User für Docker berechtigen
sudo usermod -aG docker paperless

# Paperless User wechelsn
su paperless

# Ordner erstellen
mkdir consume
chmod 777 consume
Paperless installieren
bash -c "$(curl -L https://raw.githubusercontent.com/paperless-ngx/paperless-ngx/main/install-paperless-ngx.sh)"
Config
URL:
Port: 8050
Database: postgres
Enable Apache Tika? no
OCR language: deu+eng
Ordner mit der configuration files
/home/paperless/paperles-ngx
Eingangsordner
/home/paperless/consume
Mediafolder
/home/paperless/media
Data
/home/paperless/data
Datenbank
/home/paperless/db
Docker-compose.env hinzufügen
PAPERLESS_CONSUMER_POLLING=10
Neustart
docker-compose up -d
FTP Zugang für Nextcloud
Wie man den FTP Zugang richtig anlegt
Backup and Restore
Ordner die gesichert werden müssen
- paperless_media
- paperless_data
- paperless_db
- bei Docker-Image: paperless-redisdata (Unter: /var/lib/docker/volumes/)
Backup mit rsync
zunächst Instanz beenden
Anmelden als sudo!
Da SSH nicht möglich ist: bash Datei im /-Verzeichnis das die 4 rsync übernimmt
bash_aliase hinterlegt (ini)
1.
cd /home/paperless/paperless-ngxdocker-compose down2.
rsync -arP --delete /home/paperless/paperless_media/ /mnt/Backup/paperless_media --log-file=/mnt/Backup/log/pl-media.log --ignore-existing3.
rsync -arP --delete /home/paperless/paperless_data/ /mnt/Backup/paperless_data --log-file=/mnt/Backup/log/pl-data.log --ignore-existing4.
rsync -arP --delete /home/paperless/paperless_db/ /mnt/Backup/paperless_db --log-file=/mnt/Backup/log/pl-db.log --ignore-existing5.
rsync -arP --delete /var/lib/docker/volumes/paperless_redisdata/ /mnt/Backup/paperless_redisdata --log-file=/mnt/Backup/log/pl-redis.log6.
docker-compose upmit dem Befehl rsync -a -r --delete /home/paperless /mnt/paperless_backup/datenwerden die daten auf die Synology gespiegelt mit dem Befehl rsync -a -r --delete /var/lib/docker/volumes/paperless_redisdata /mnt/paperless_backup/config/paperless_redisdata werden die config files gespiegelt.
Folgende Cronjobs sind erstellt:
Restore
zum wiederherstellen Paperless in Portainer stoppen und die Ordner ersetzen
Um die Daten wiederherzusellen werden die 3 Ordner:
- paperless_data
- paperless_db
- paperless_media
- paperless_redisdata (aus docker-volume)
benötigt.
Zum wiederherstellen werden die Ordner zurück kopiert. Danach sollte es wieder gehen sofern die Berechtigungen passen.
Weitere Infos zur Administration
Updating Paperless
IP-Adresse Paperless Server: 10.1.2.19
Docker Route
If a new release of paperless-ngx is available, upgrading depends on how you installed paperless-ngx in the first place. The releases are available at the release page.
First of all, ensure that paperless is stopped.
cd /home/paperless/paperless-ngxdocker-compose downAfter that, make a backup.
- If you pull the image from the docker hub, all you need to do is:
docker-compose pulldocker-compose upThe docker-compose files refer to the latest version, which is always the latest stable release.
Umbrel
Install umbrelOS on a Raspberry Pi 5
Note
umbrelOS is designed for the Umbrel Home. Support for other devices is best-effort and not guaranteed. Some features like external storage support and Migration Assistant are not available - see our feature comparison for more details.
umbrelOS can be installed on a Raspberry Pi 5 in a number of configurations. The two most common are:
Installing umbrelOS on the NVMe or USB drive
In this configuration, you will install umbrelOS directly on an NVMe drive or USB drive, which will be automatically partitioned to store umbrelOS and your data.
Note
Booting from NVMe or USB instead of a microSD card is only supported on Raspberry Pi 5 for umbrelOS 1.2.0 and later. Booting from NVMe or USB is not supported on Raspberry Pi 4. Additionally, certain NVMe drives may not be compatible with specific NVMe HATs. It is crucial to check the compatibility of your NVMe drive with the HAT you are using before proceeding. HAT manufacturers typically provide lists of compatible drives and known quality issues on their websites. Using a drive not on the compatible list may result in instability or failure to boot. Also, make sure to check the quality of your NVMe SSD, as some drives are of poor quality or have reported issues that could affect performance and reliability.
What you will need
Steps
Tip
If you have an early Raspberry Pi 5 model, you may need to update the bootloader firmware in order to be able to boot from NVMe. If this is the case, please follow the official Raspberry Pi documentation on how to update the bootloader firmware: https://www.raspberrypi.com/documentation/computers/raspberry-pi.html#bootloader_update_stable
Warning
The boot order on your Raspberry Pi 5 is set to boot from a microSD card preferentially before booting from NVMe or USB. Make sure that you do not have a bootable microSD card inserted when booting from NVMe or USB. If you have a microSD card inserted, the Raspberry Pi 5 will boot from the microSD card instead of the NVMe or USB drive.
Installing umbrelOS on a microSD card and using an external SSD for storage
Warning
Installing umbrelOS on a microSD card is not recommended primarily because microSD cards have a limited number of write cycles. Over time, frequent read and write operations can cause the microSD card to wear out and fail, leading to system instability, data corruption, and potential data loss. Also, microSD cards generally offer lower performance and durability compared to NVMe or USB drives, which are better suited for the continuous operation required by umbrelOS. For a more reliable and long-lasting setup, it is advisable to boot from NVMe or USB storage.
In this configuration, you will install umbrelOS on a microSD card and then use a separate external SSD to store your data.
What you will need
Steps
Installieren von Apps über Comandline
3.1 Test using an umbrelOS development environment on your local machine
The umbrelOS development environment (umbrel-dev) requires a Docker environment that exposes container IPs to the host. This is how Docker natively works on Linux and can be done with OrbStack on macOS and WSL 2 on Windows.
1. Install OrbStack on macOS or WSL 2 with Docker Desktop on Windows.
2. Clone the getumbrel/umbrel repo.
From the root of the cloned repo, run the following command to view the available umbrel-dev commands:
npm run dev help
To start the development environment, run the following command:
npm run dev
Note
If this is your first time running the development environment, it may take a while to build the OS image locally on your machine.
Once initialized, umbrelOS will be accessible at http://umbrel-dev.local.
3. Copy the app's directory (with any .gitkeep files excluded) to the app-store directory on umbrel-dev.
To do this, we run the following command on our local machine:
rsync -av --exclude=".gitkeep" <path-to-your-forked-repo-on-local-machine>/btc-rpc-explorer umbrel@umbrel-dev.local:/home/umbrel/umbrel/app-stores/getumbrel-umbrel-apps-github-53f74447/
If you are asked for a password during the transfer, use the password that you set when you created your umbrelOS account.
4. Install the app.
From the umbrelOS homescreen, go to the App Store and navigate to BTC RPC Explorer. Click on the "Install" button and wait for the app to install.
You can also install the app from the command line. umbrelOS provides a web terminal that can be accessed via Settings > Advanced Settings > Terminal > umbrelOS, or you can use the umbrel-dev scripts to install the app using the umbreld RPC server:
npm run dev client -- apps.install.mutate -- --appId btc-rpc-explorer
umbreld client apps.uninstall.mutate --appId plex # zum installeren auf dem Umbrel That's it! Our BTC RPC Explorer app should now be accessible at http://umbrel-dev.local:3002
To uninstall the app, you can right-click on the app's icon on your homescreen and click on the "Uninstall" button. You can also uninstall the app using the umbrel-dev scripts:
npm run dev client -- apps.uninstall.mutate -- --appId btc-rpc-explorer
Veraltet und wohl aus früheren Versionen
Can you try again to install manually:
~/umbrel/scripts/app uninstall tailscale
Then
~/umbrel/scripts/app install tailscale
You can replace the name of the app as it's listed here: https://github.com/getumbrel/umbrel-apps/tree/master
Let me know if any issue
Vaultwarden (Bitwarden) installieren
Vorgehensweise
Alternative implementation of the Bitwarden server API written in Rust and compatible with upstream Bitwarden clients*, perfect for self-hosted deployment where running the official resource-heavy service might not be ideal.
📢 Note: This project was known as Bitwarden_RS and has been renamed to separate itself from the official Bitwarden server in the hopes of avoiding confusion and trademark/branding issues.
This project is not associated with the Bitwarden project nor Bitwarden, Inc.
⚠️IMPORTANT⚠️: When using this server, please report any bugs or suggestions to us directly (look at the bottom of this page for ways to get in touch), regardless of whatever clients you are using (mobile, desktop, browser...). DO NOT use the official support channels.
Host your own Vaultwarden with NGINX
Diese Repository zeigt dir, wie du deinen eigenen Vaultwarden Passwort Manager Server erstellen und konfigurieren kannst. Ich nutzte hierfür Proxmox, das ganze kann aber auch mit einem RaspberryPi oder vergleichbarer Hardware gemacht werden. Eine Ausführliche Anleitung findet du auf meinem YouTube Kanal.
Features
Basically full implementation of Bitwarden API is provided including:
- Organizations support
- Attachments and Send
- Vault API support
- Serving the static files for Vault interface
- Website icons API
- Authenticator and U2F support
- YubiKey and Duo support
- Emergency Access
Vorbereitungen
Verwende ein aktuelles Debian System in einem Proxmox Container
apt-get update && apt-get upgrade -y && apt autoremove -y
apt install curl
apt install argon2

curl -sSL https://get.docker.com | sh
apt install docker-compose -y
Installation
mkdir docker
cd docker
mkdir Vaultwarden
mkdir Vaultwarden
nano docker-compose.yml
Admin-Token als Hash Wert erstellen
Nach dem generieren des Admin-Token kann dieser in die Docker-Compose Datei eingefügt werden, hierbei muss vor jedem "$"- Zeichen ein weiteres "$" ergänzt werden!
# Using the Bitwarden defaults
echo -n "MySecretPassword" | argon2 "$(openssl rand -base64 32)" -e -id -k 65540 -t 3 -p 4
Importieren der docker-compose.yml Datei
version: '3'

services:
  vaultwarden:
    restart: always
    container_name: vaultwarden
    image: vaultwarden/server:latest
    volumes:
      - ./vw-data/:/data/
    ports:
      - 80:80
    environment:
      - SMTP_HOST=smtp.gmail.com
      - SMTP_FROM=yourmailadress@gmail.com
      - SMTP_FROM_NAME=Vaultwarden
      - SMTP_SECURITY=force_tls
      - SMTP_PORT=465
      - SMTP_USERNAME=yourmailadress@gmail.com
      - SMTP_PASSWORD=YourAppPasswort
      - SMTP_TIMEOUT=30
      - SMTP_AUTH_MECHANISM="Plain"
      - LOGIN_RATELIMIT_MAX_BURST=10
      - LOGIN_RATELIMIT_SECONDS=60
      - DOMAIN=yourDomain or IP-Adress
      - INVITATION_ORG_NAME=HomeVault
      - INVITATIONS_ALLOWED=true
      - ADMIN_TOKEN=YourArgon2 key or Passwort
      - SIGNUPS_ALLOWED=true
      - SIGNUPS_DOMAINS_WHITELIST=example.com,mydomain.net,myotherdomain.org
      - SIGNUPS_VERIFY=true
      - SIGNUPS_VERIFY_RESEND_TIME=3600
      - SIGNUPS_VERIFY_RESEND_LIMIT=6
      - EMERGENCY_ACCESS_ALLOWED=true
      - SENDS_ALLOWED=true
      - WEB_VAULT_ENABLED=true
In der yml-Datei SMTP einstellungen Anpassen. Die Domain Eintragen und den AdminToken generieren.
Kopiere nun den Inhalt aus der docker-compose.yml.txt Datei in deine eben erstellte .yml datei und passe es entsprechend an.
Anschließend kann der Container ausgerollt werden.
docker-compose up -d
Domain über Proxy Manager mit der IP Adresse verknüpfen
Als nächstes die Domain mit der IP-Adresse des Vaultwarden verknüpfen und die SSL verschlüselung aktivieren.
Update
Noch nicht getestet
Update über docker-compose
Im Ordner in der die docker-compose.yml datei liegt folgendes eingeben:
docker-compose downdanach
docker-compose upAlte Version
Admin Zugang
Der Adminzugang ist erreichbar über domain.co/admin. Hier muss der Token eingegeben werden. Der ist da zu finden, wo er gespeichert ist.
Bitwarden installieren
Bitwarden im Dockercontainer installieren mithilfe von Portainer
Volume
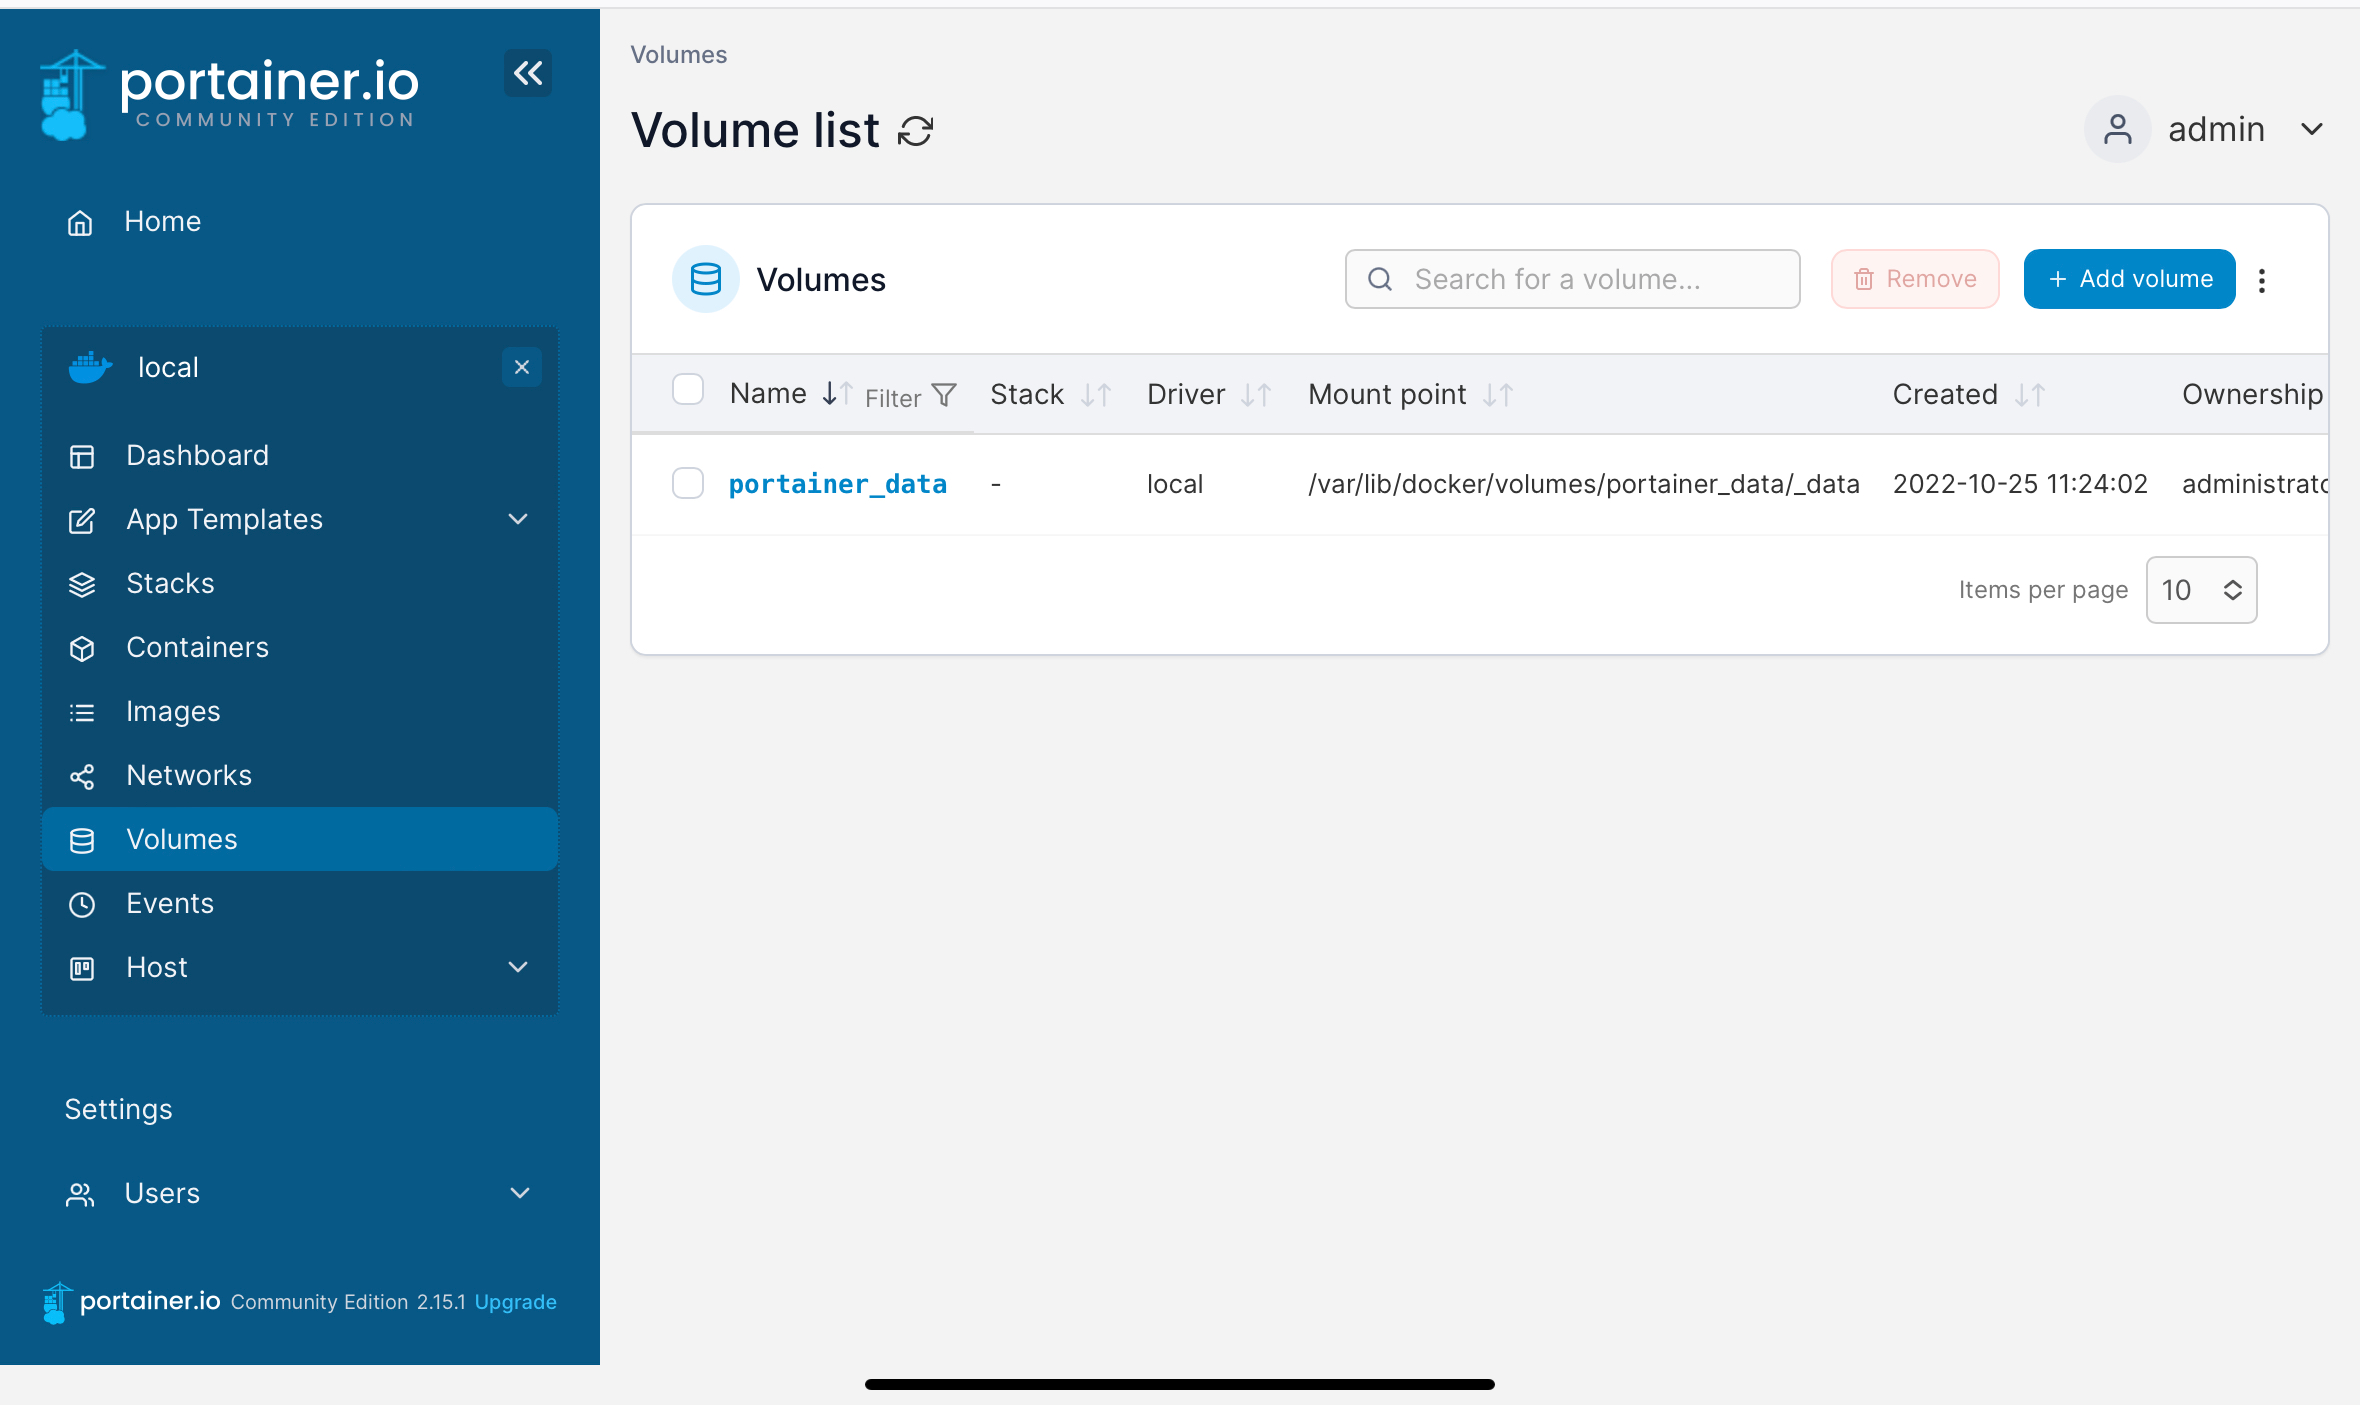
Volumes > Add volume
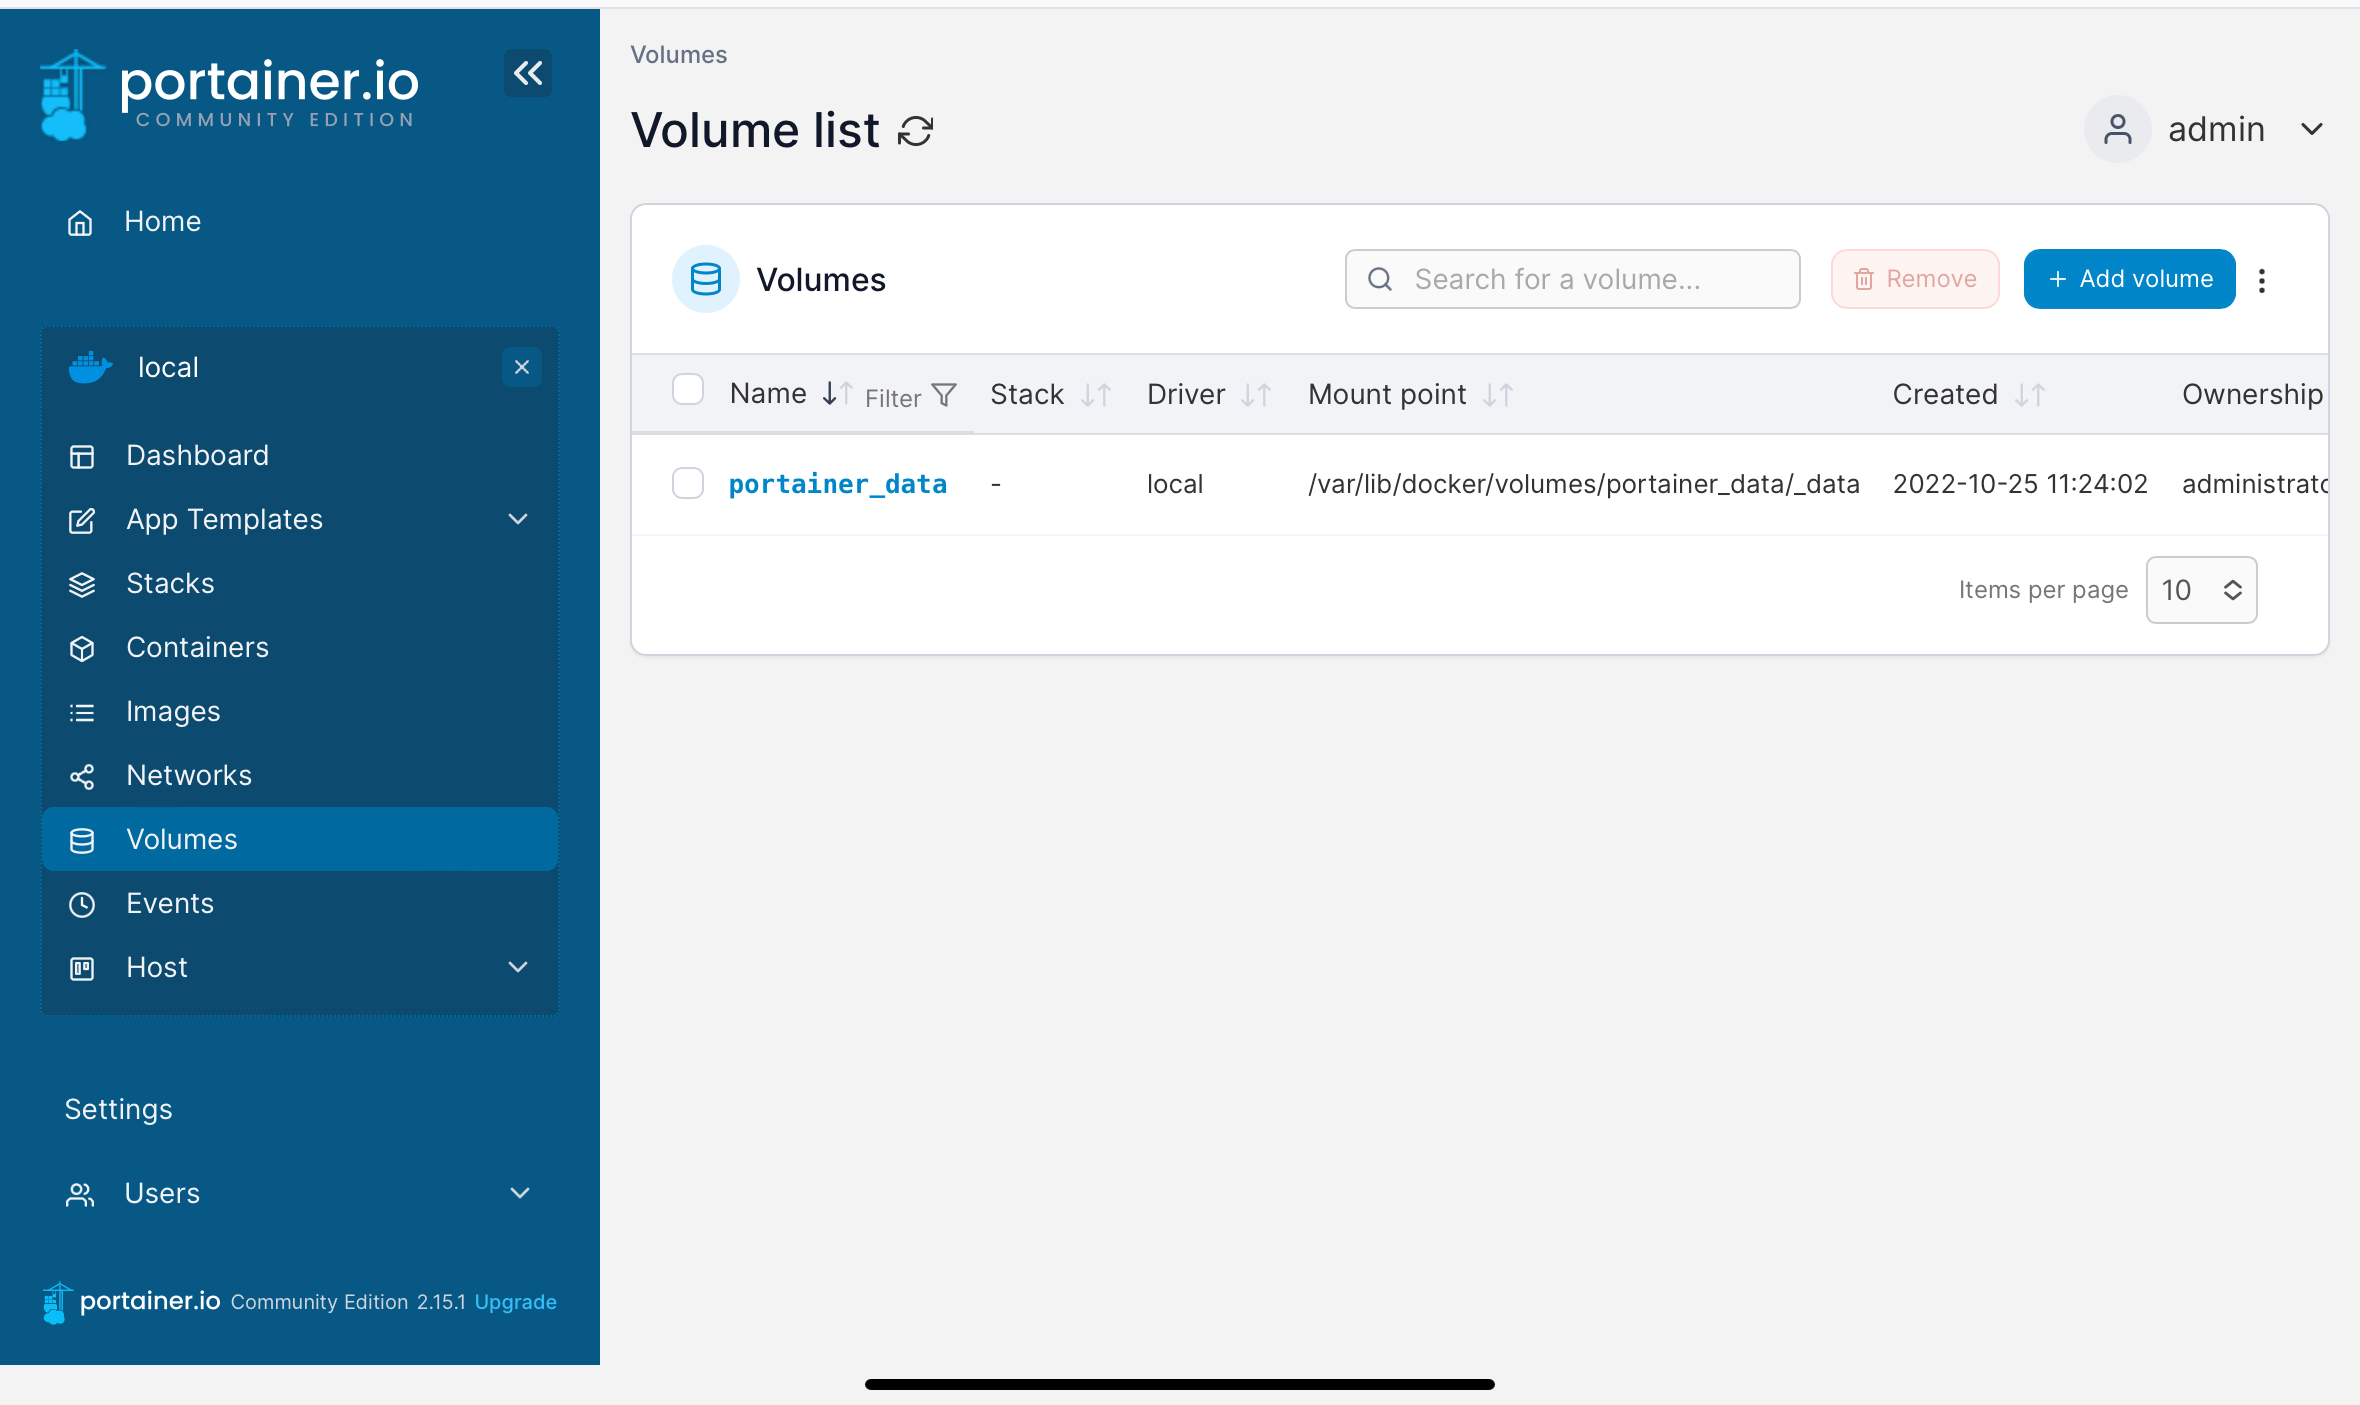
Name: vaultvarden
Container
Add Container
- Name: Vaultwarden
- image: vaultwarden/server:latest
+publish a new network port
host: 8080 contianer: 80
Advanced Container settings
Volume
+map additional volume
Container: /data
Select a Volume (vorher erstelltes Volume): vaultwarden
Restart policy
Always
Deploy the Conainer
Um immer den aktuellsten Vaultwarden zu verwenden am besten Watchtower einrichten
Admin-Token
der wird ebenfalls in der Config-Json Datei gespeichert
Sterling PDF
Ein Server, der alles erdenkliche mit PDF's anstellen kann
Installation
Docker installieren
Falls Docker fehlt, installieren Sie es:
sudo apt update sudo apt install ca-certificates curl
sudo install -m 0755 -d /etc/apt/keyrings
sudo curl -fsSL https://download.docker.com/linux/debian/gpg -o /etc/apt/keyrings/docker.asc
sudo chmod a+r /etc/apt/keyrings/docker.asc echo "deb [arch=$(dpkg --print-architecture) signed-by=/etc/apt/keyrings/docker.asc] https://download.docker.com/linux/debian $(. /etc/os-release && echo "$VERSION_CODENAME") stable" | sudo tee /etc/apt/sources.list.d/docker.list > /dev/null
sudo apt update && sudo apt install docker-ce docker-ce-cli containerd.io docker-buildx-plugin docker-compose-plugin
sudo usermod -aG docker $USER && newgrp docker
sudo systemctl enable --now docker
Stirling-PDF starten (docker run)
Erstellen Sie ein Verzeichnis und starten Sie den Container:
mkdir ~/stirling-pdf && cd ~/stirling-pdf
mkdir configs trainingData logs customFiles
docker run -d \
  --name stirling-pdf \
  -p 8080:8080 \
  -v $(pwd)/configs:/configs \
  -v $(pwd)/trainingData:/usr/share/tesseract-ocr/5/tessdata \
  -v $(pwd)/logs:/logs \
  -v $(pwd)/customFiles:/customFiles \
  -e DOCKER_ENABLE_SECURITY=true \
  -e SECURITY_ENABLELOGIN=true \
  -e SECURITY_INITIALLOGIN_USERNAME=admin \
  -e SECURITY_INITIALLOGIN_PASSWORD=deinPasswort \
  --restart unless-stopped \
  stirlingtools/stirling-pdf:latest
Zugriff unter http://deine-ip:8080, Login mit admin/deinPasswort.
Mit Docker Compose (empfohlen)
Erstellen Sie docker-compose.yml:
version: '3.3'
services:
  stirling-pdf:
    image: stirlingtools/stirling-pdf:latest
    container_name: stirling-pdf
    ports:
      - '8080:8080'
    volumes:
      - ./configs:/configs
      - ./trainingData:/usr/share/tesseract-ocr/5/tessdata
      - ./logs:/logs
      - ./customFiles:/customFiles
    environment:
      - DOCKER_ENABLE_SECURITY=true
      - SECURITY_ENABLELOGIN=true
      - SECURITY_INITIALLOGIN_USERNAME=admin
      - SECURITY_INITIALLOGIN_PASSWORD=deinPasswort
    restart: unless-stopped
Führen Sie docker compose up -d aus. Updates: docker compose pull && docker compose up -d